
I’ve got BIG news! Last week, I was asked to be a regular contributor over at Heritage Homesteaders! I’m so excited to part of this great group of people! So, head on over & check out my introductory post! While you’re there, take a look around. This group has a lot of great knowledge to share with everyone from beginning homesteaders to the experienced. I’m a firm believer that we never stop learning, no matter how long we may have been doing something.
Author: Steph

Jar Soap Dispenser Tutorial
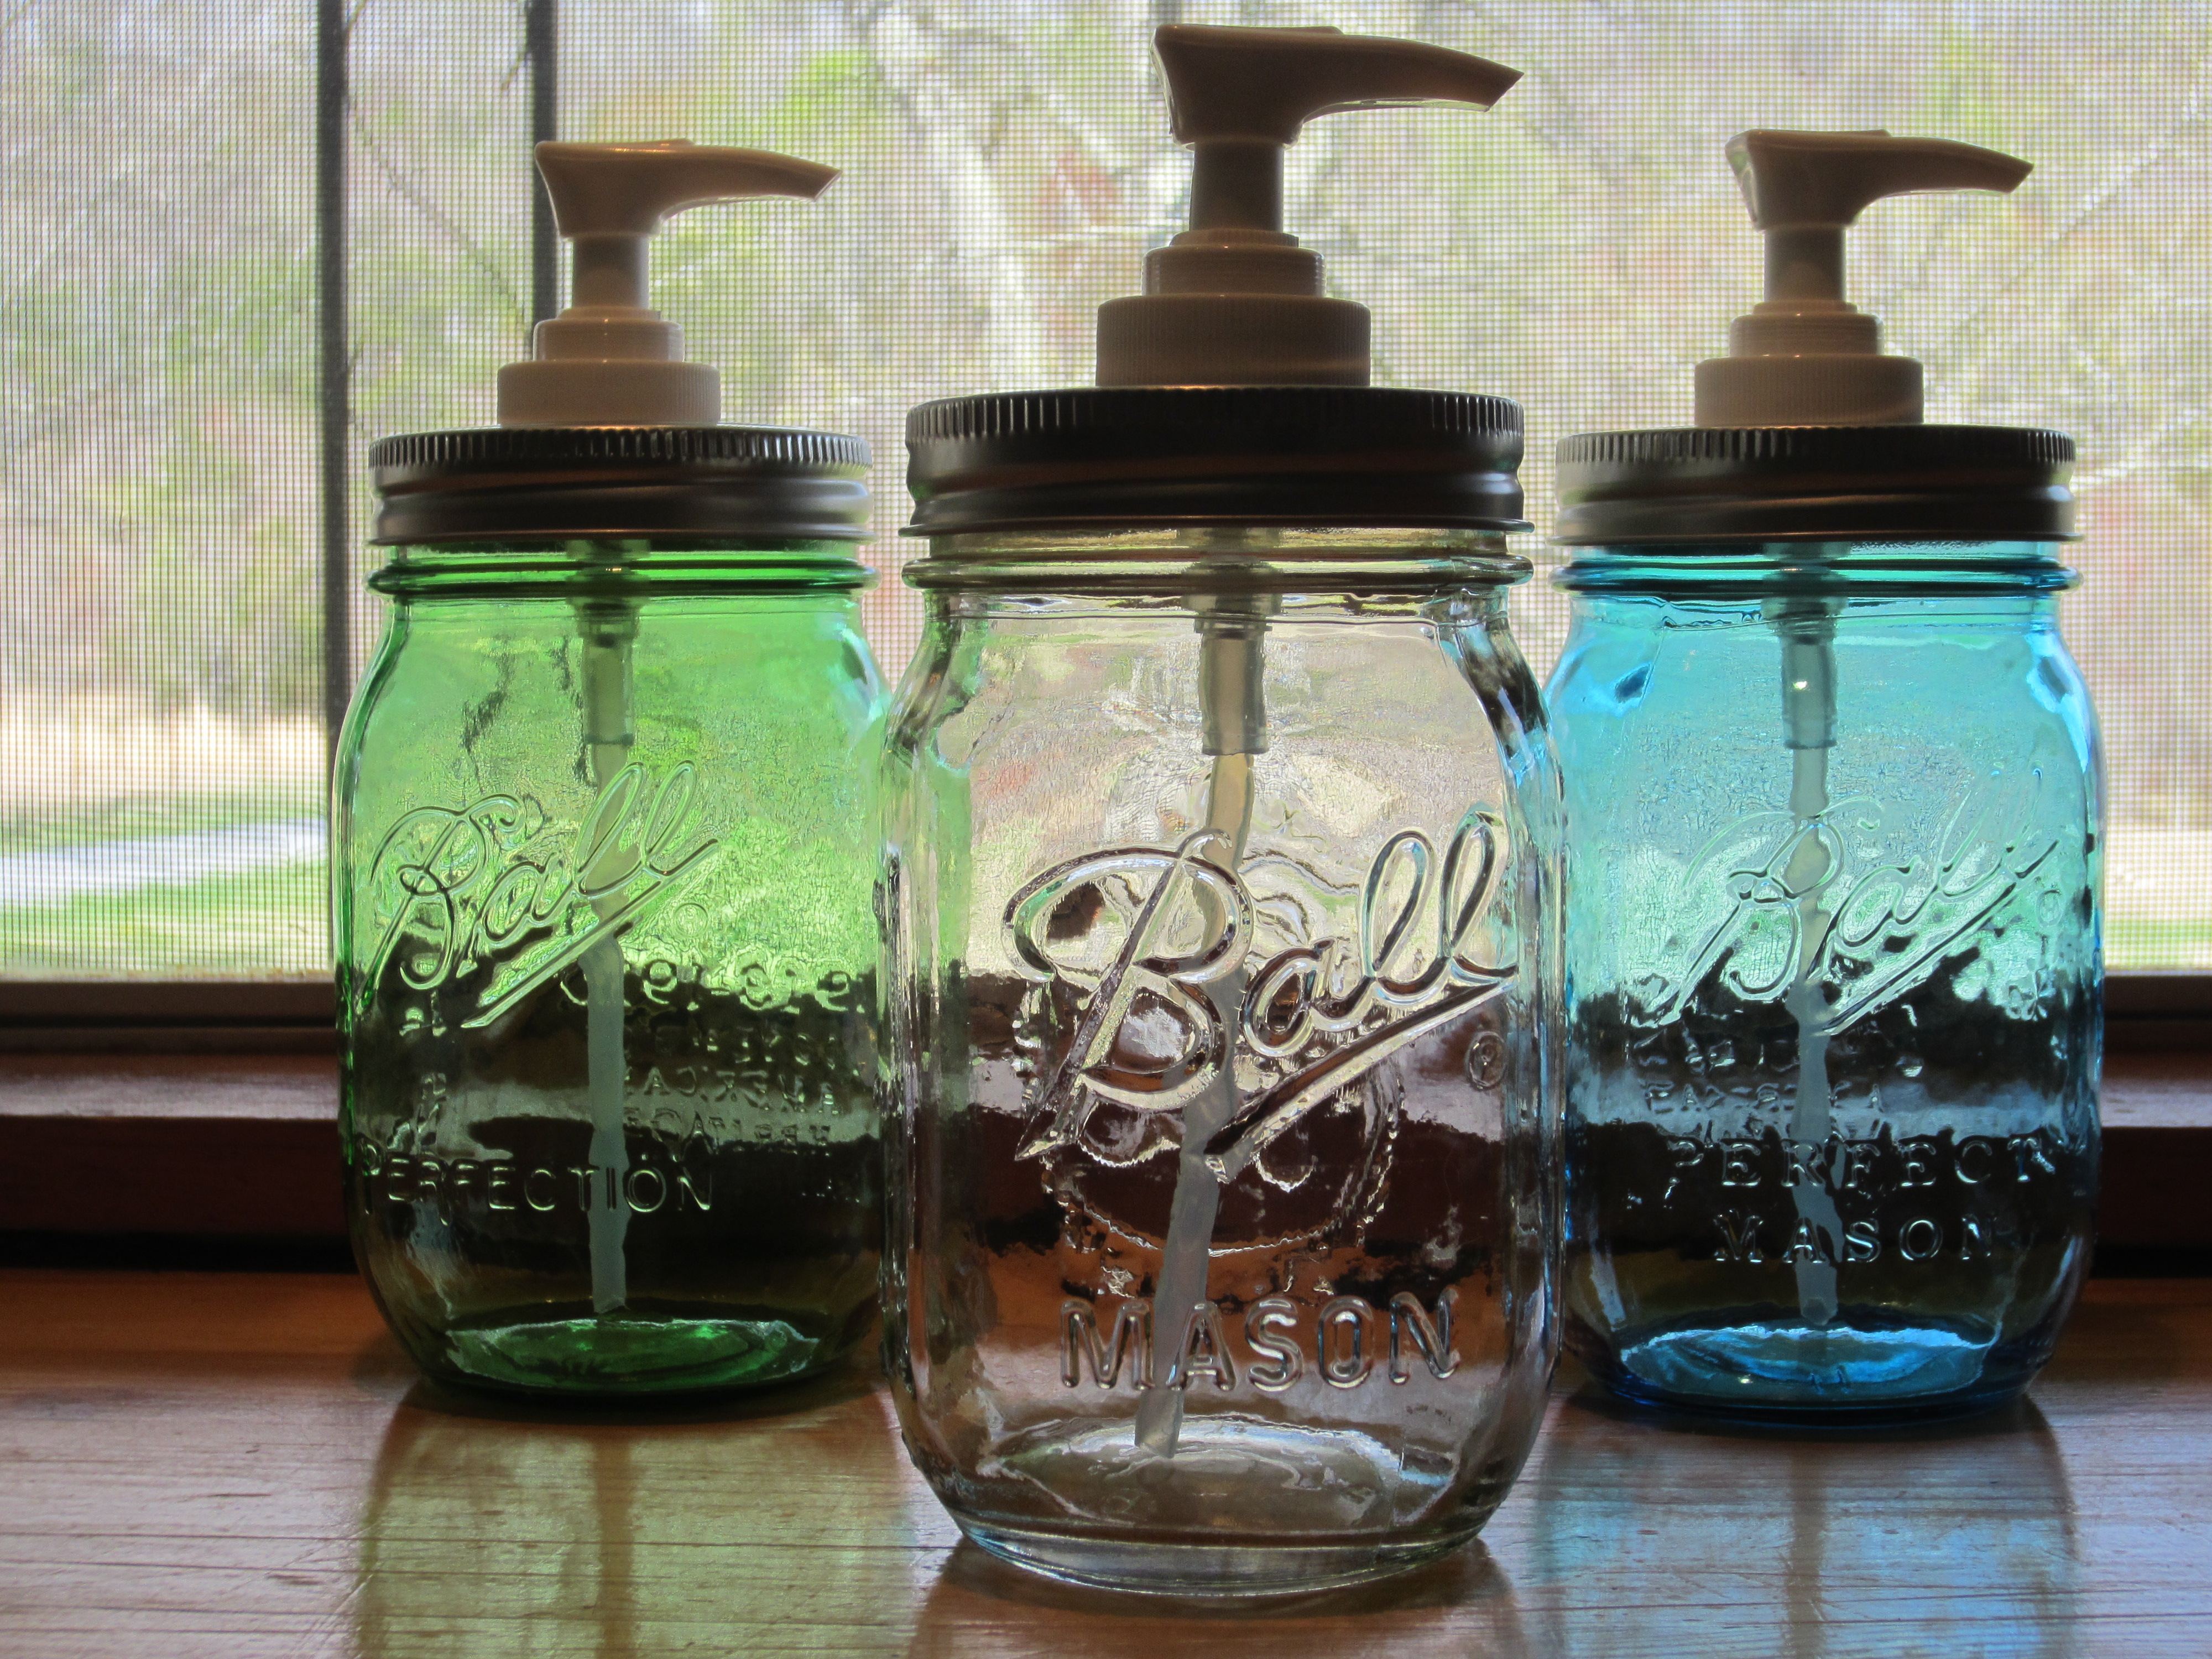
Jar Soap Dispensers
I’ve been wanting to make these for quite some time now. I had ordered the soap pump dispensers a few weeks ago, but just had not had the time to get around to making them until this week! My sweet hubby gave me a helping hand and we had all six done in no time flat!
Here are the items that you will need to make your own mason jar soap dispensers:
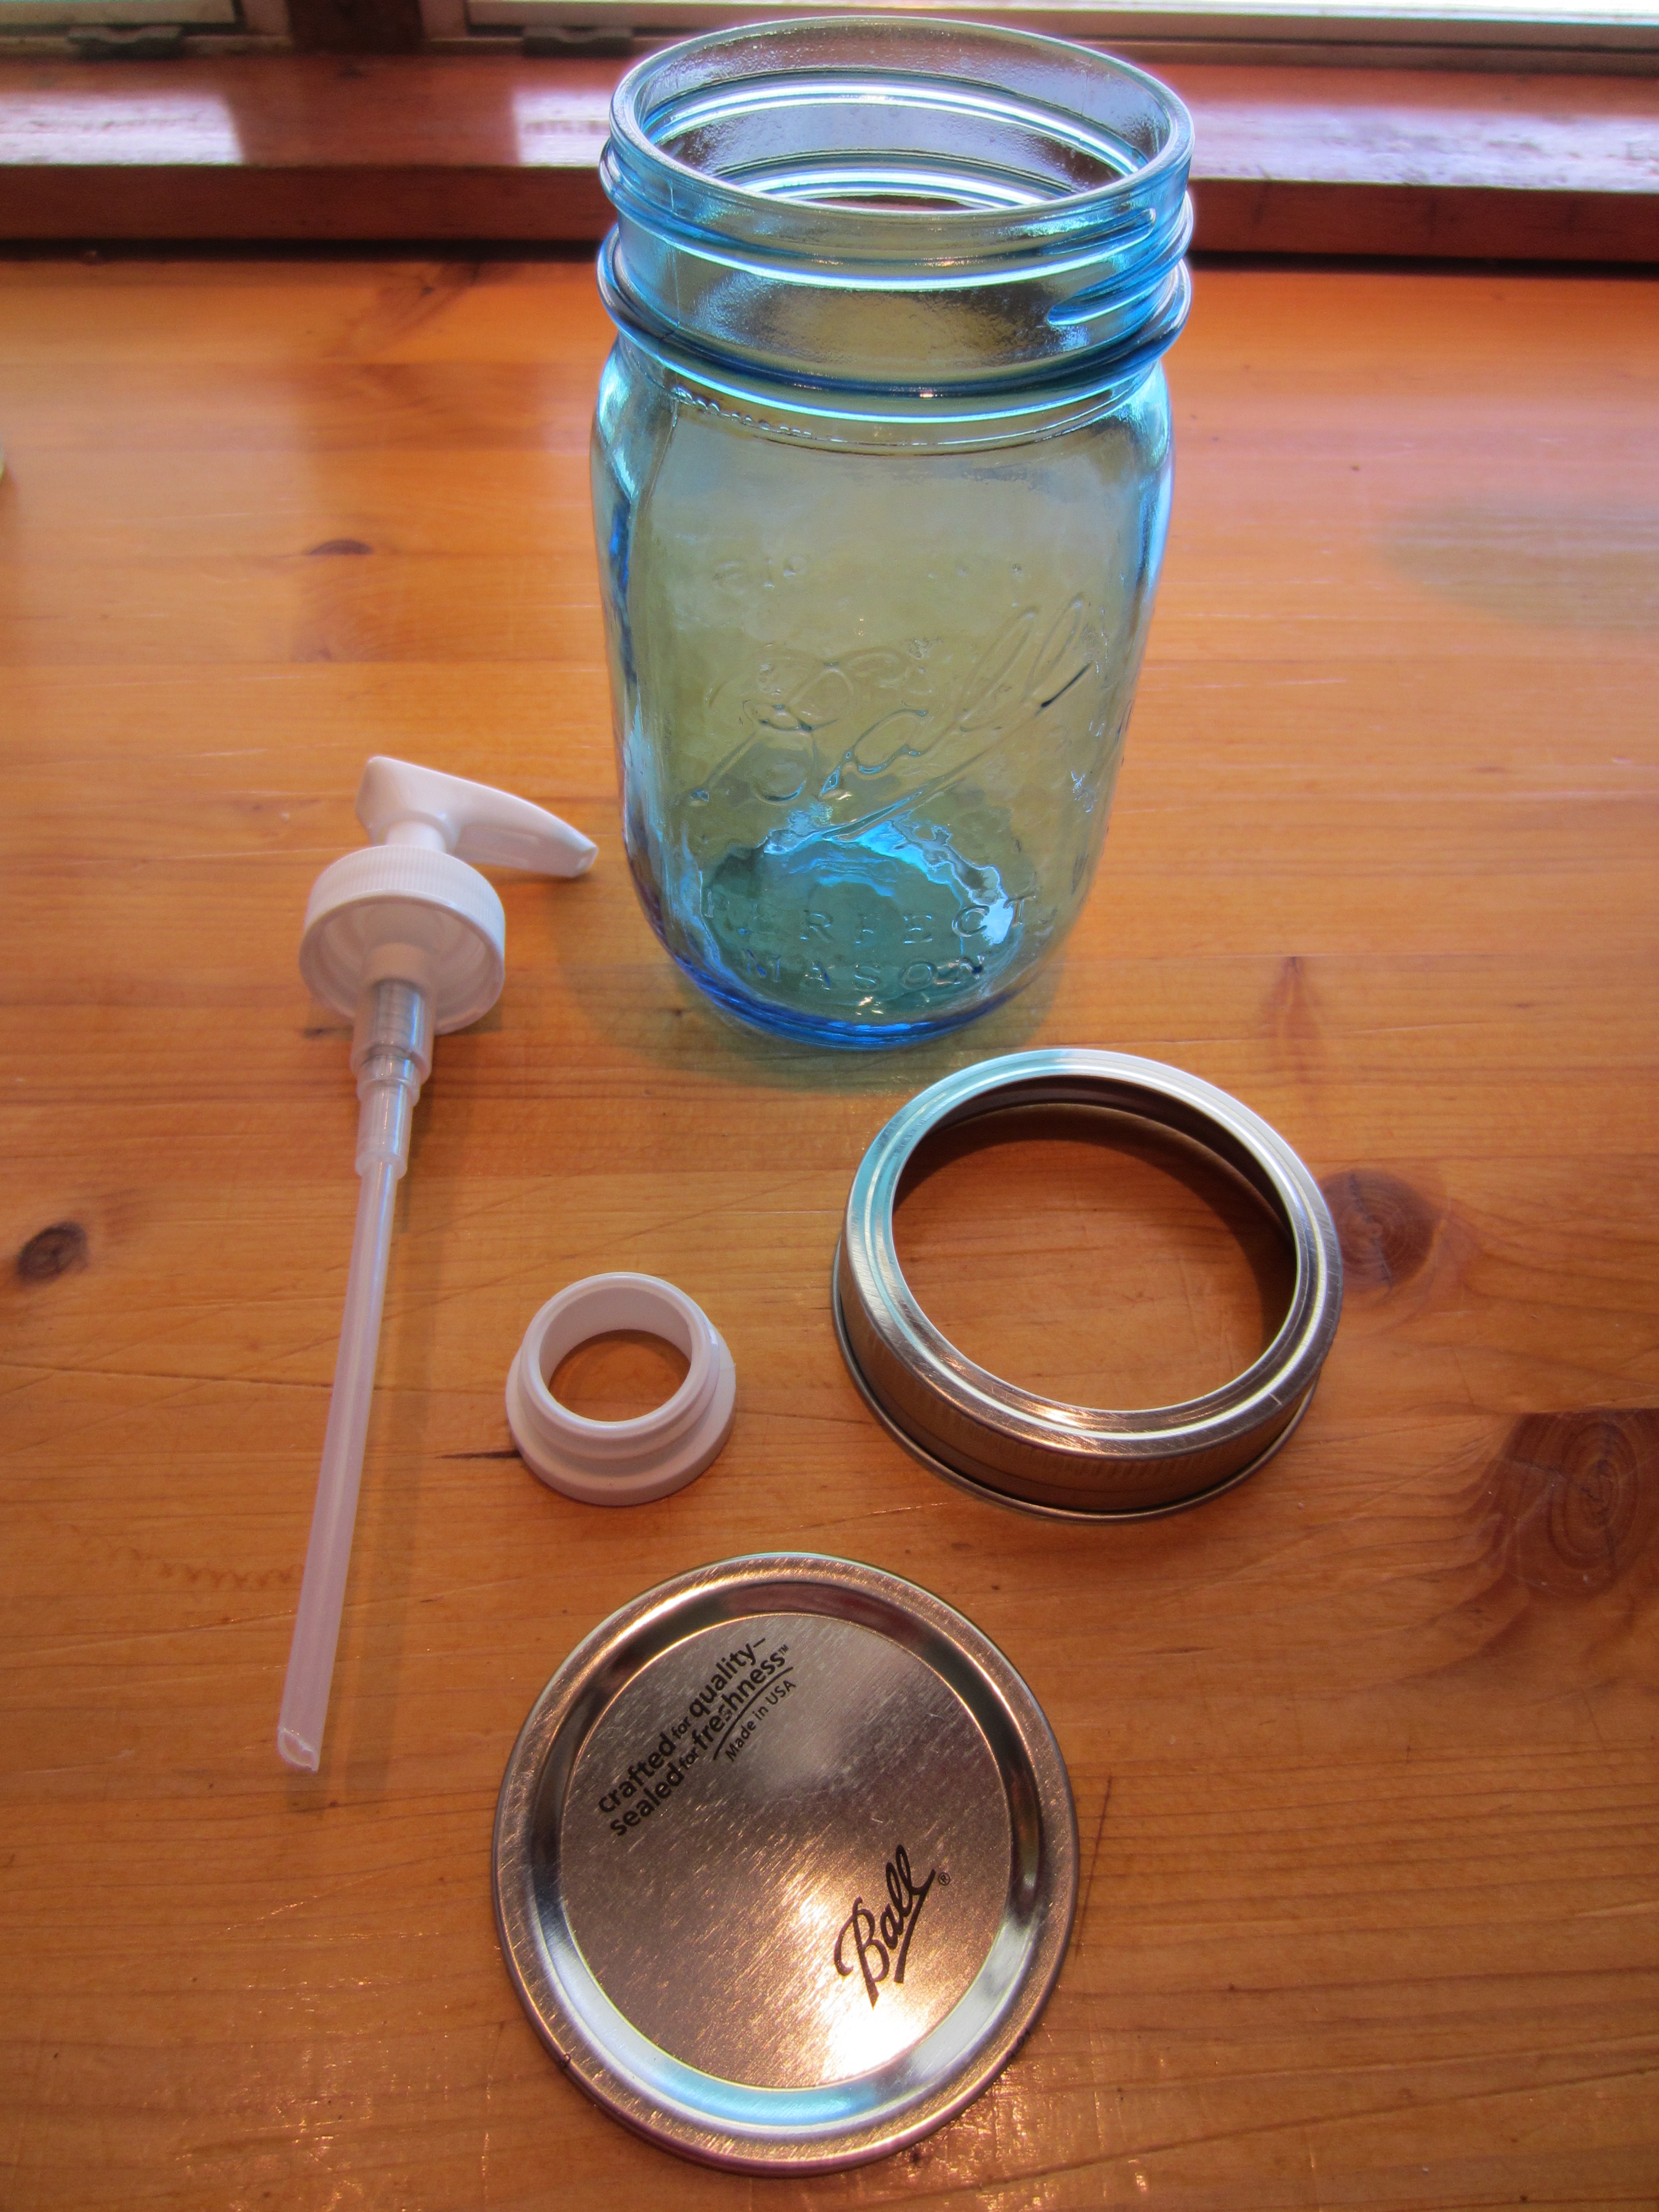
Ball Mason jars (Any jar will do, but they do have blue and green jars available now!)
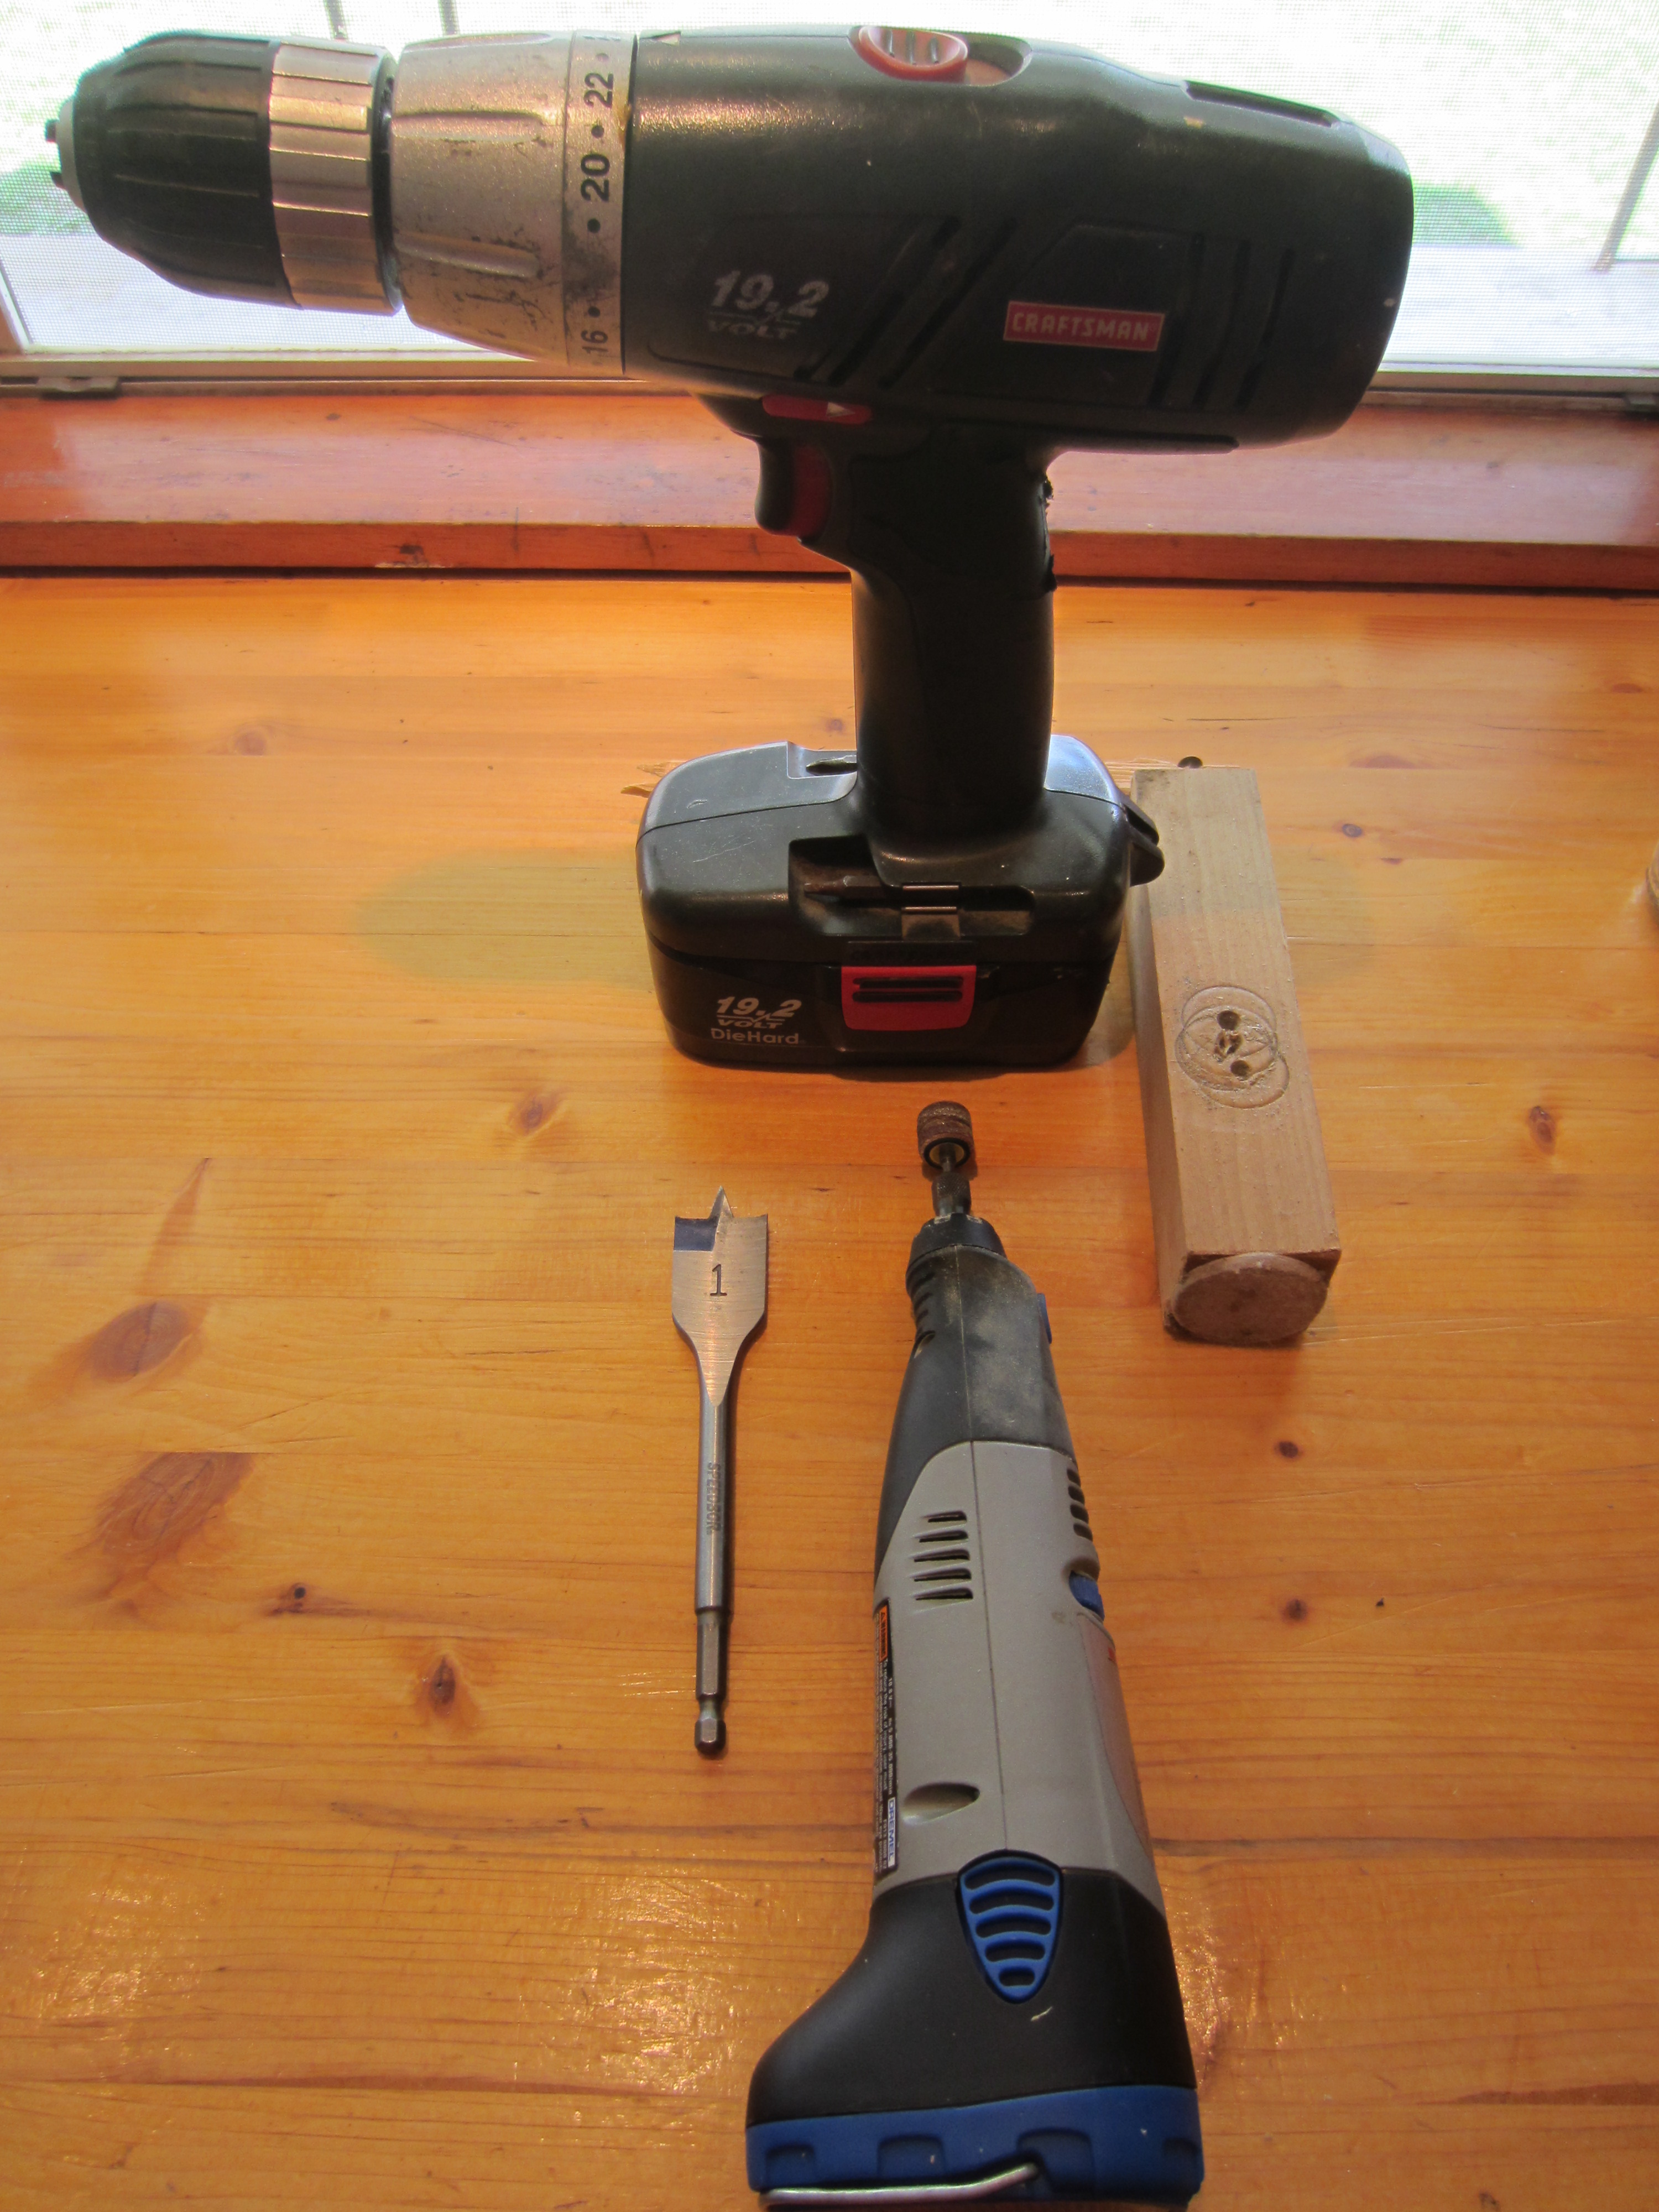
Drill
1-inch paddle drill bit (1-1/8-inch drill bit is pretty much the perfect size, but a little harder to find)
Dremel
Using the piece of wood, place the lid (aka seal) onto the piece of wood and, being very careful (wear gloves, if you have them), hold the lid tightly. You will actually run the drill backwards to keep it from grabbing the lid as hard.
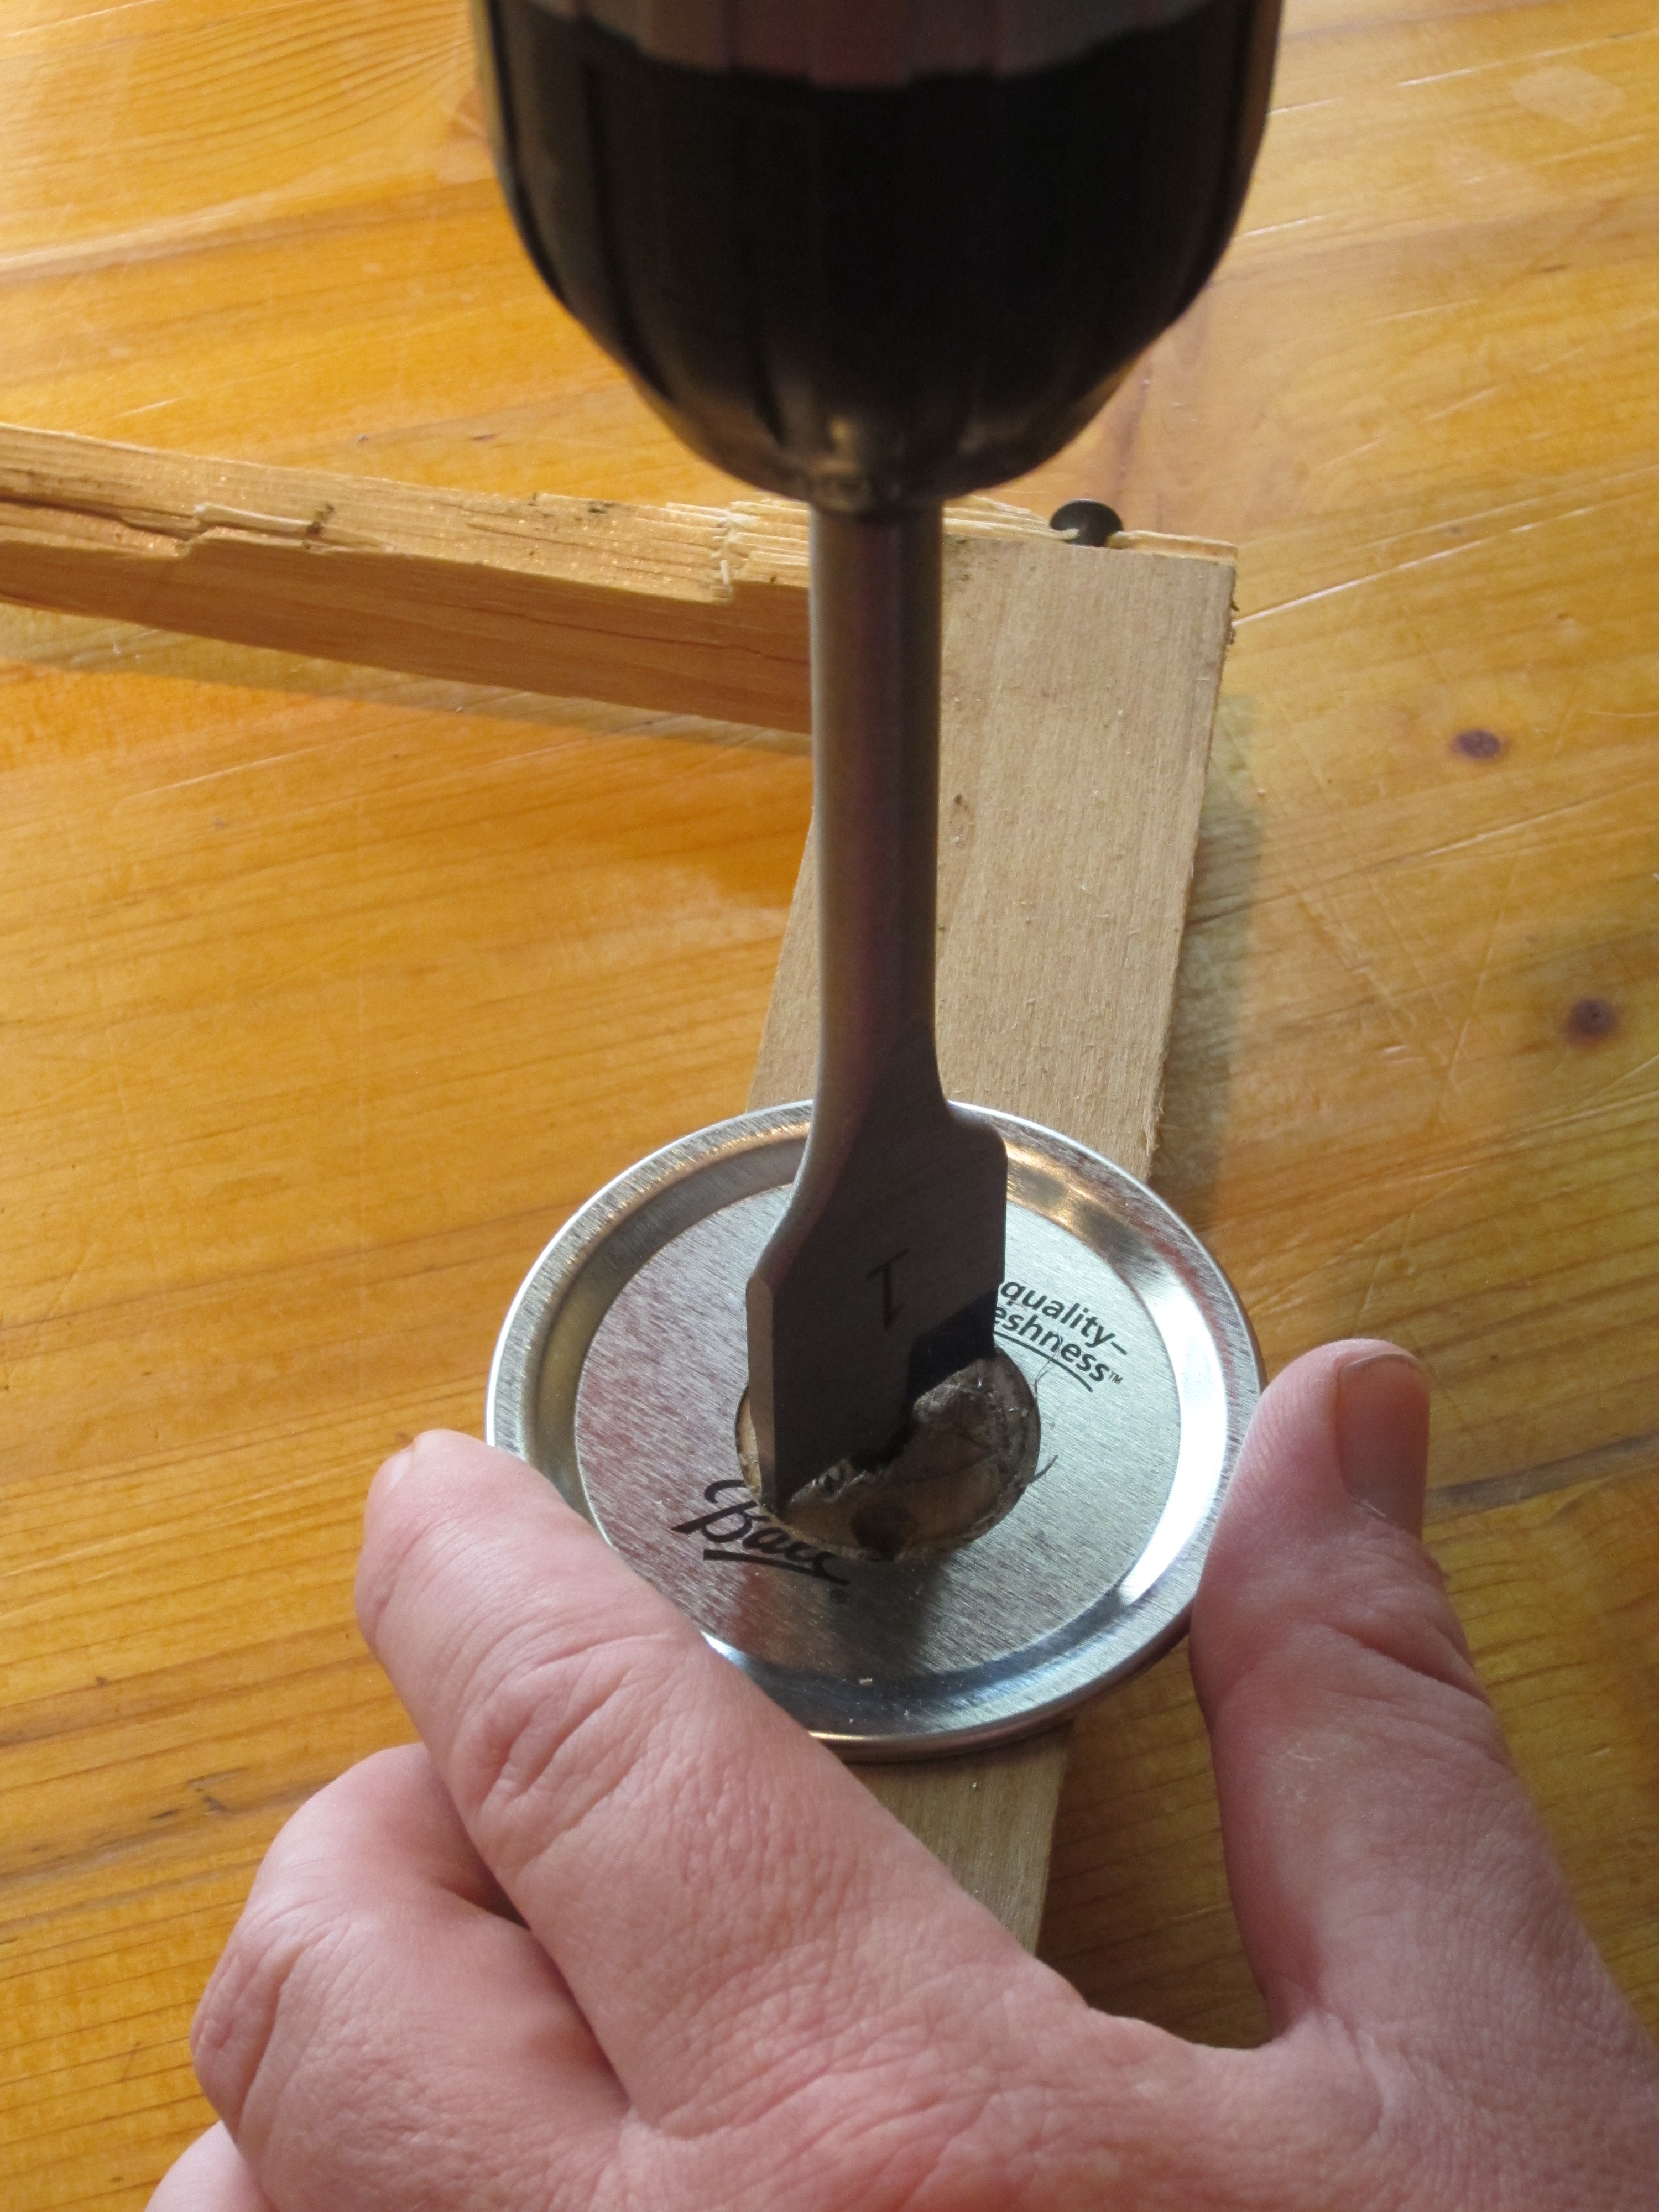
It makes a nice, clean hole without you having to fight to hold the lid in place as much.
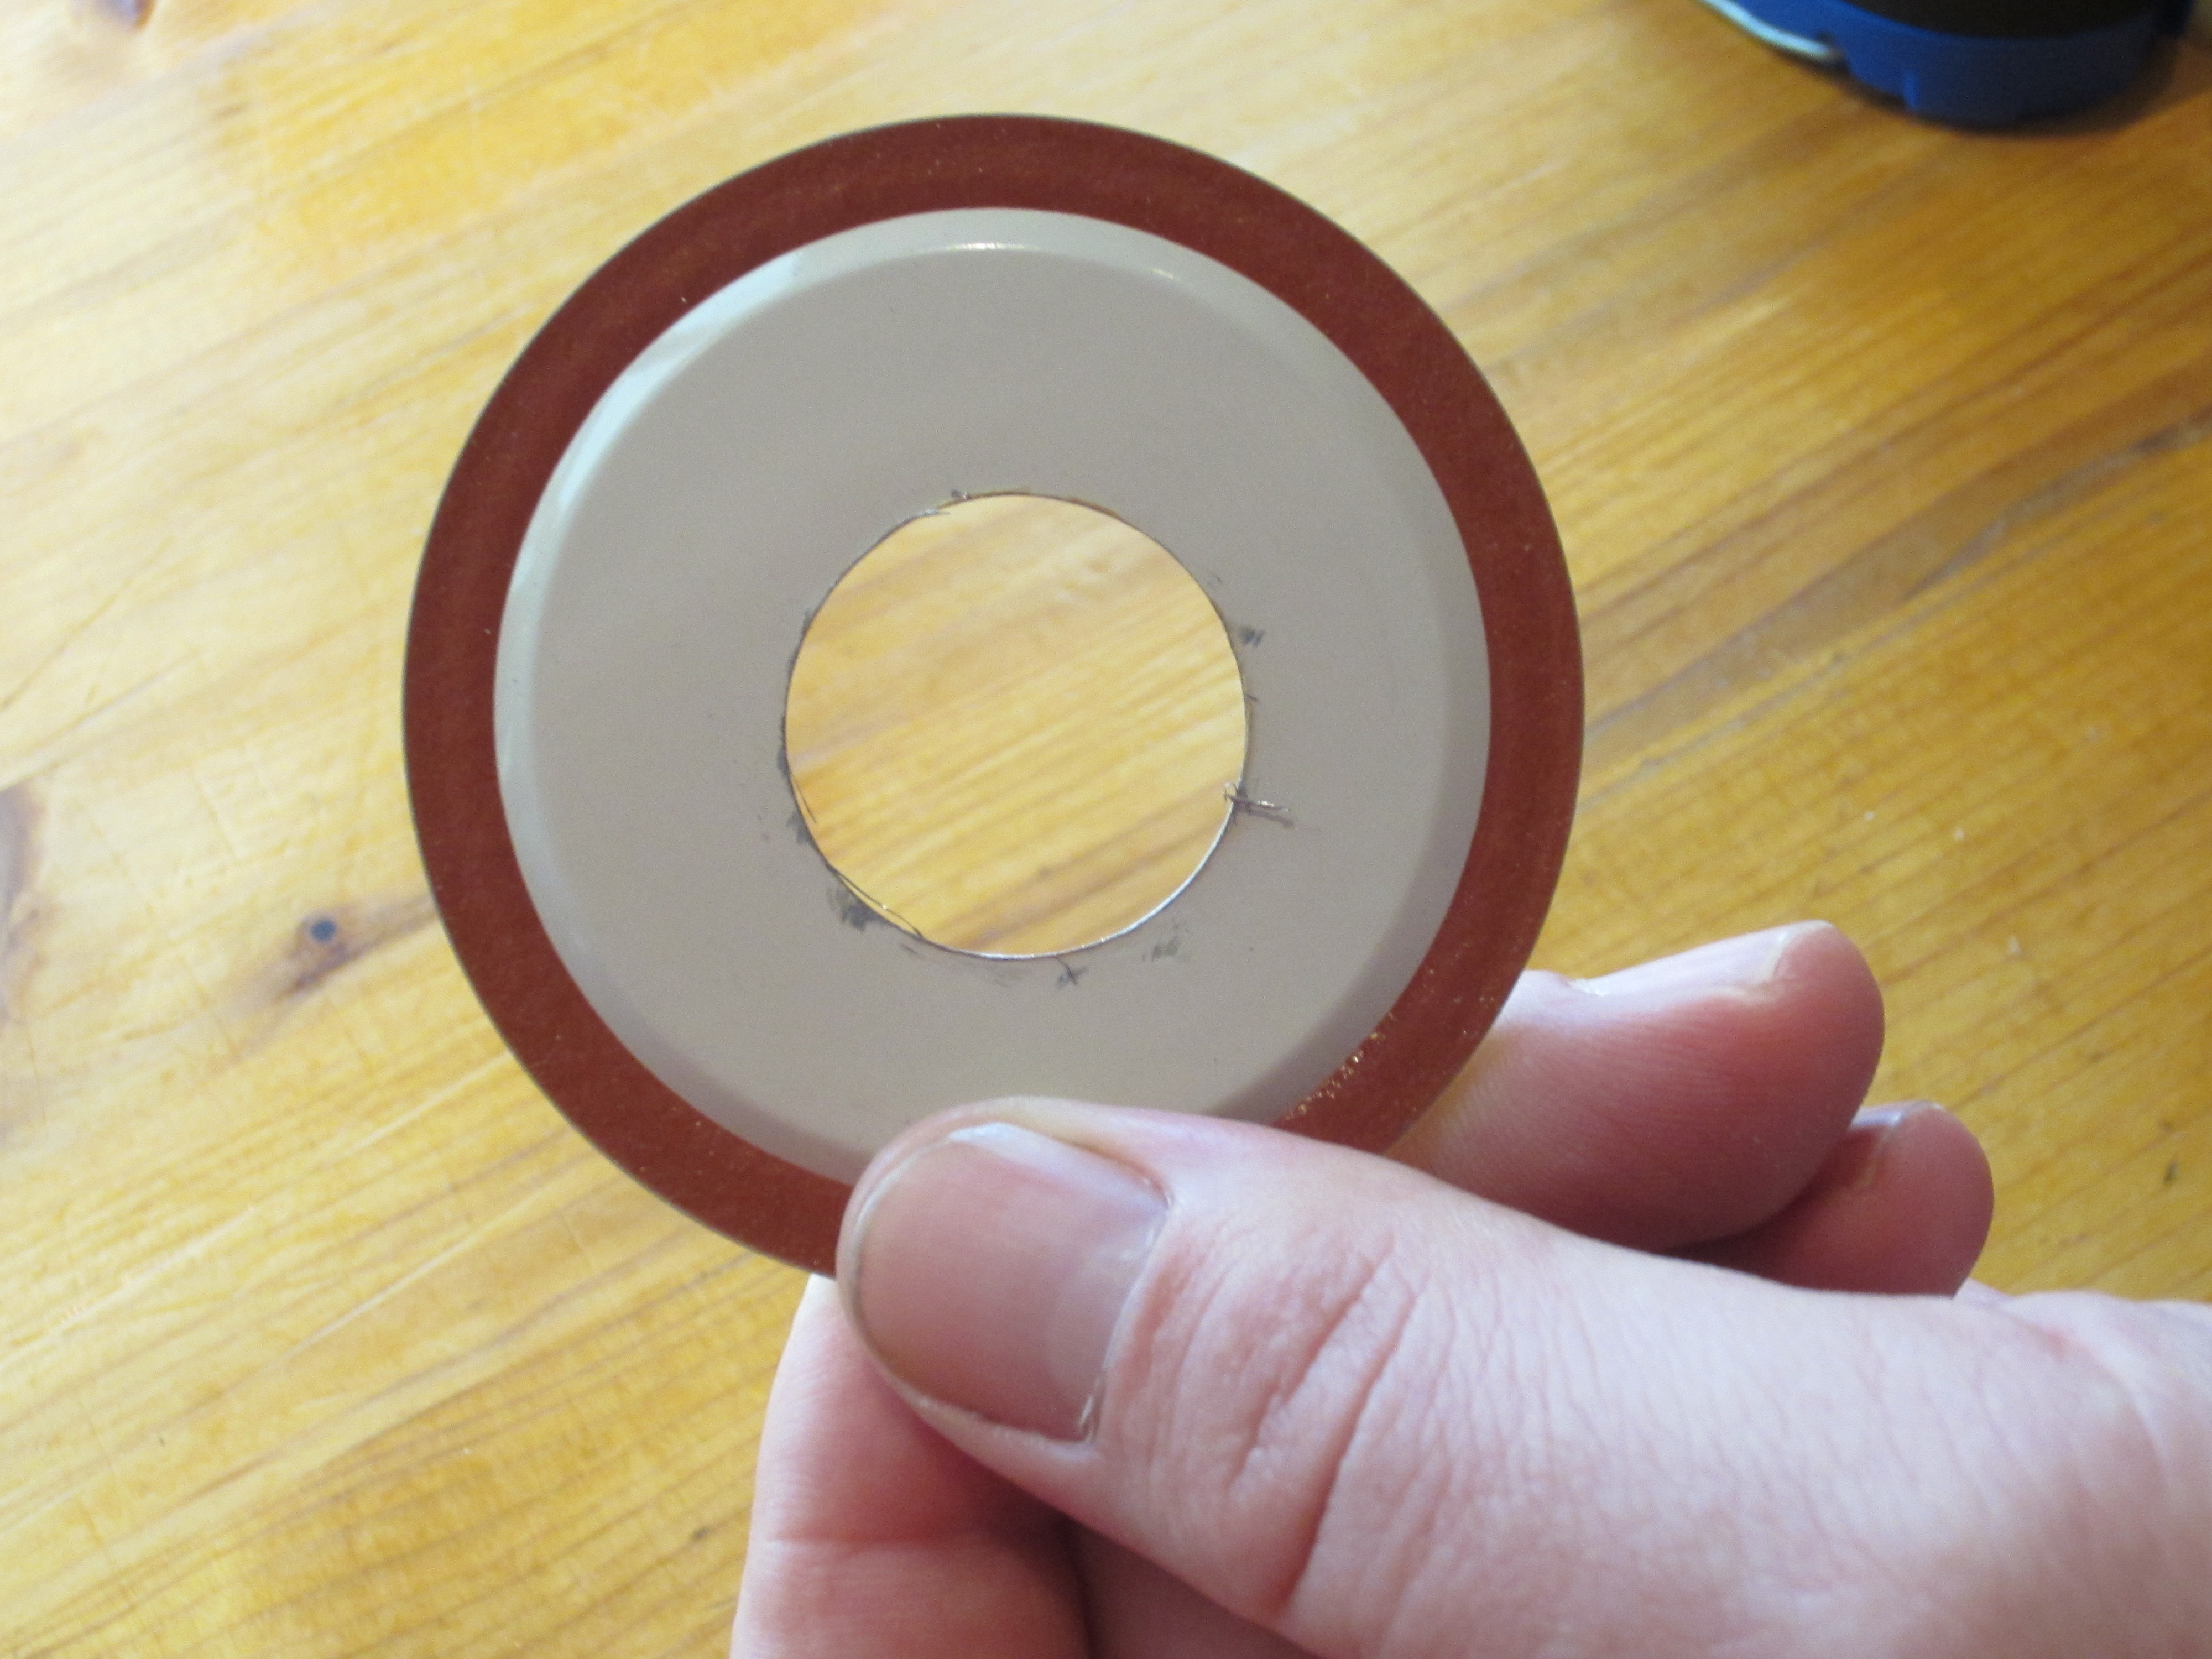
Next, you will want to take the Dremel & file down the edges.
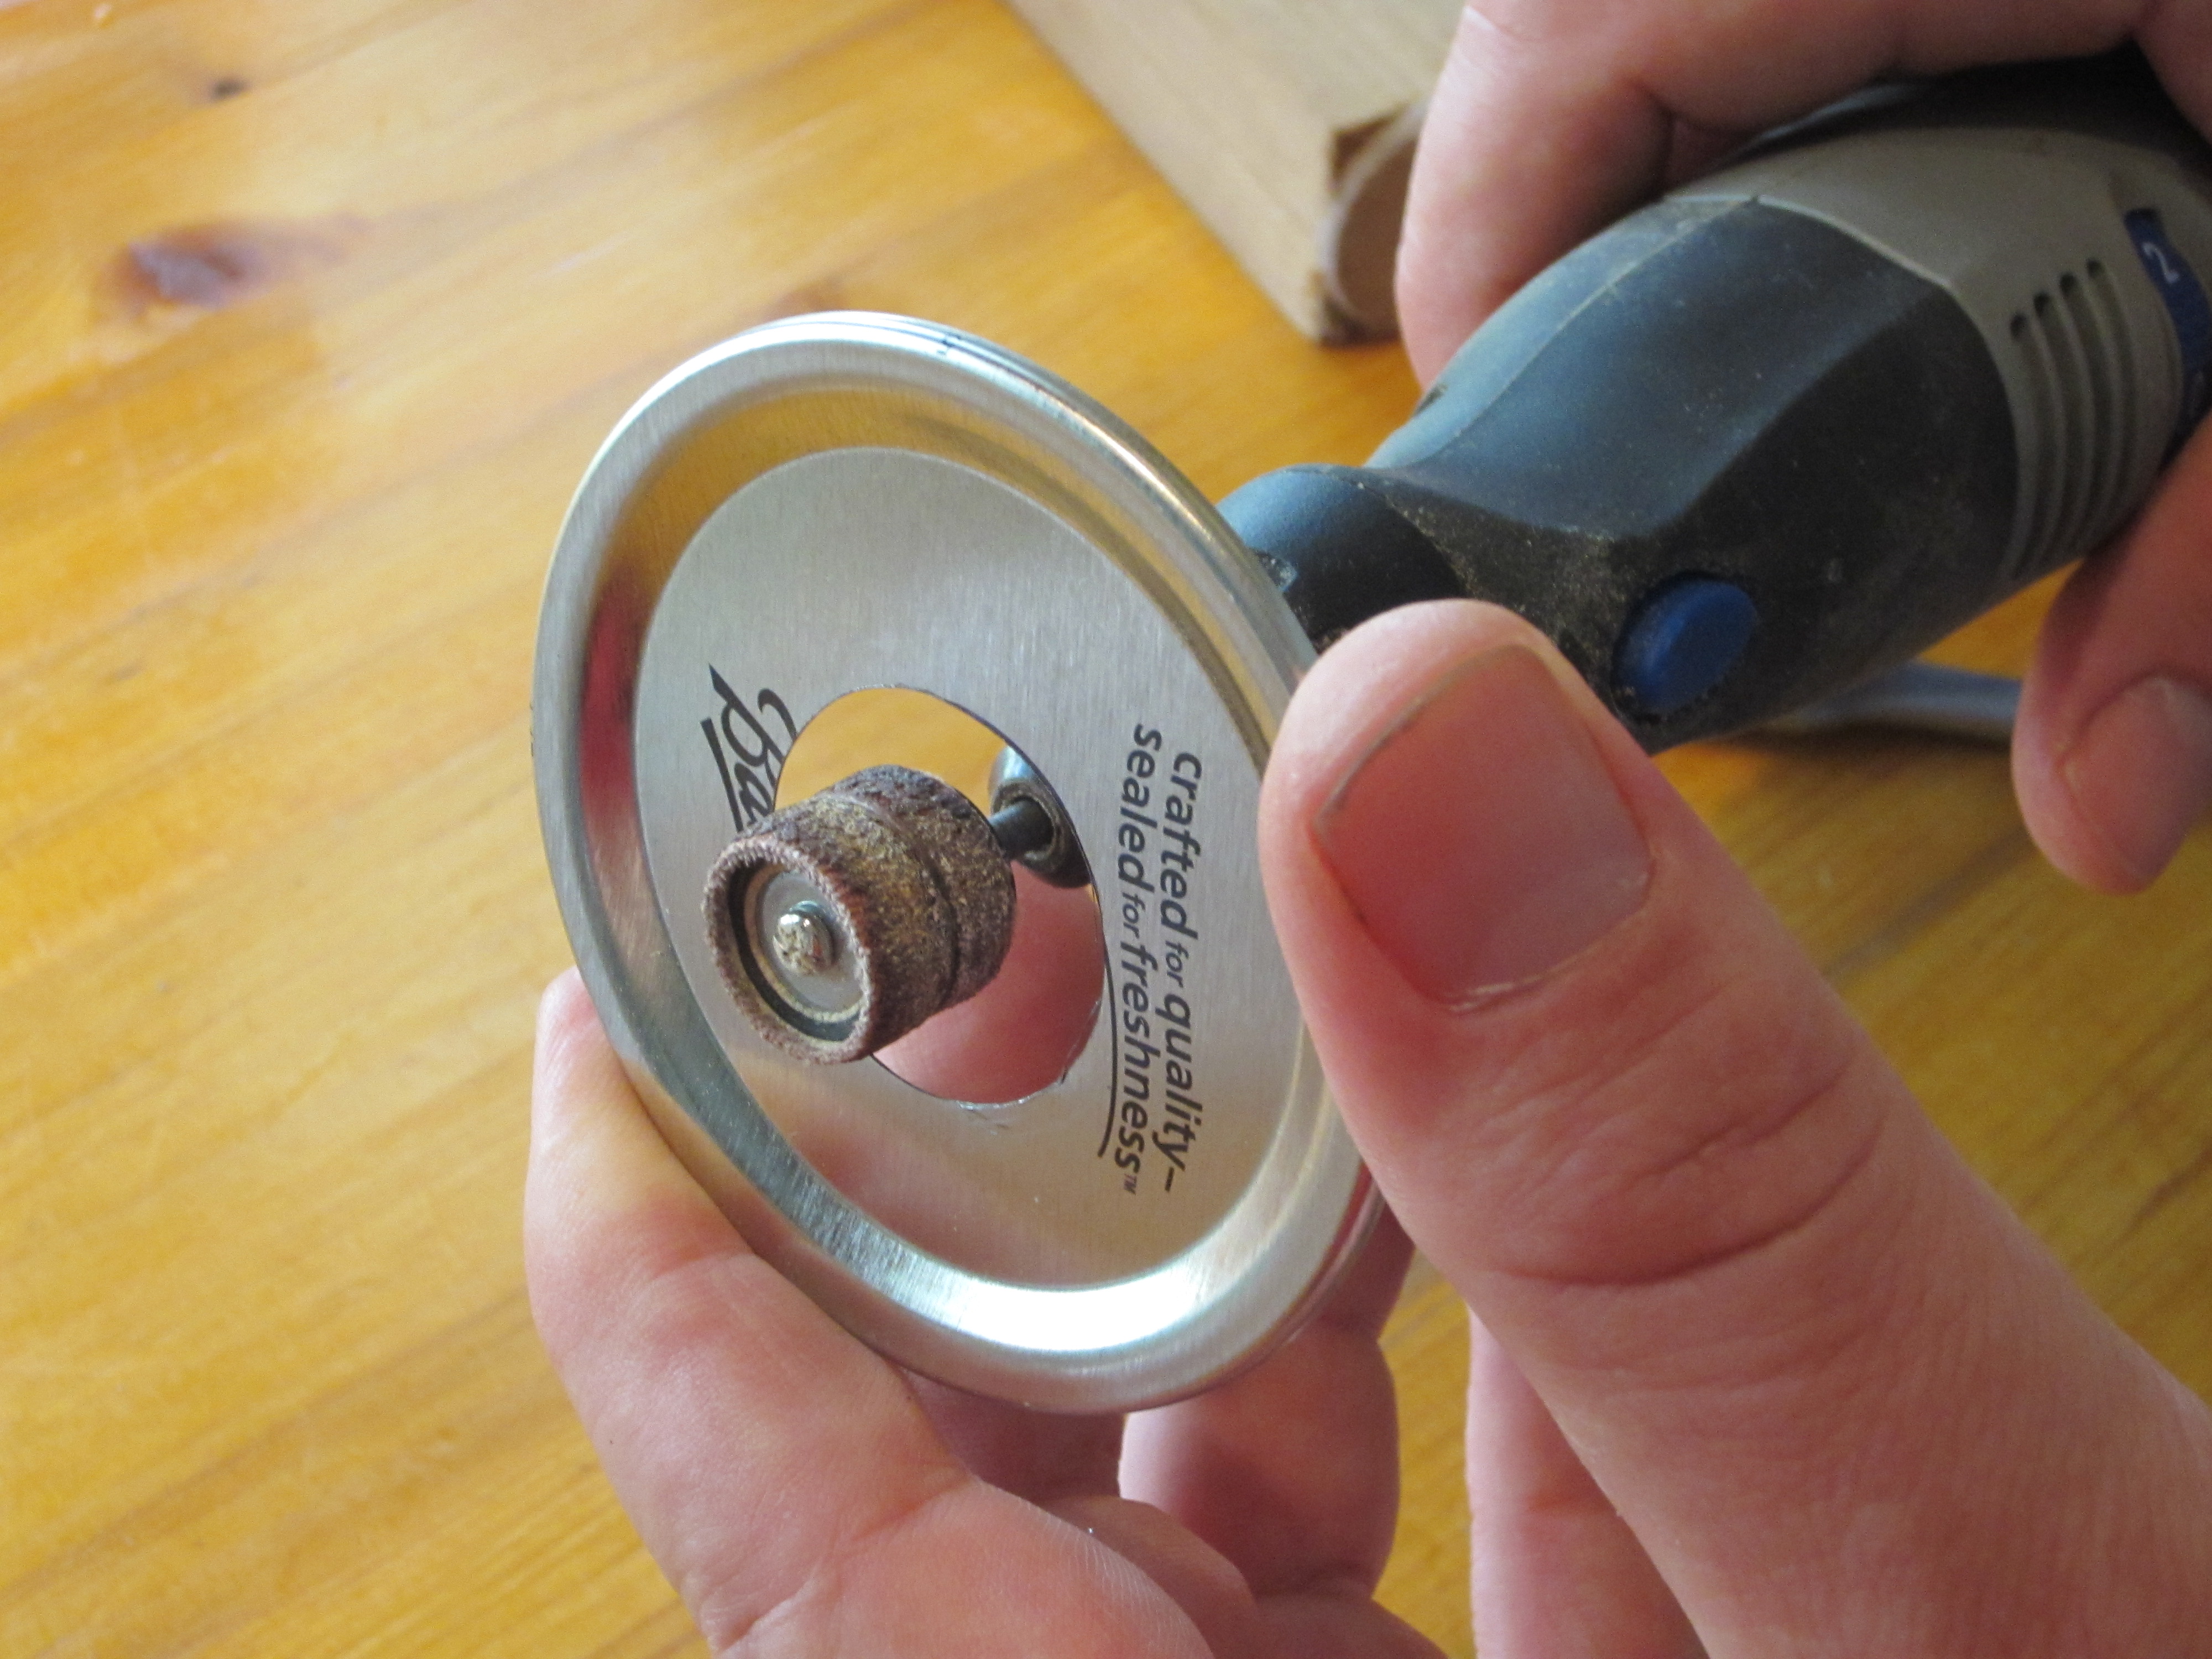
Once you are done, see if the collar of the soap pump fits through the hole.

If it won’t quite fit, use the Dremel to file down the edges of the hole you cut just until the collar slips through. Be careful not to make it too loose.
It will look like this when you’re done.
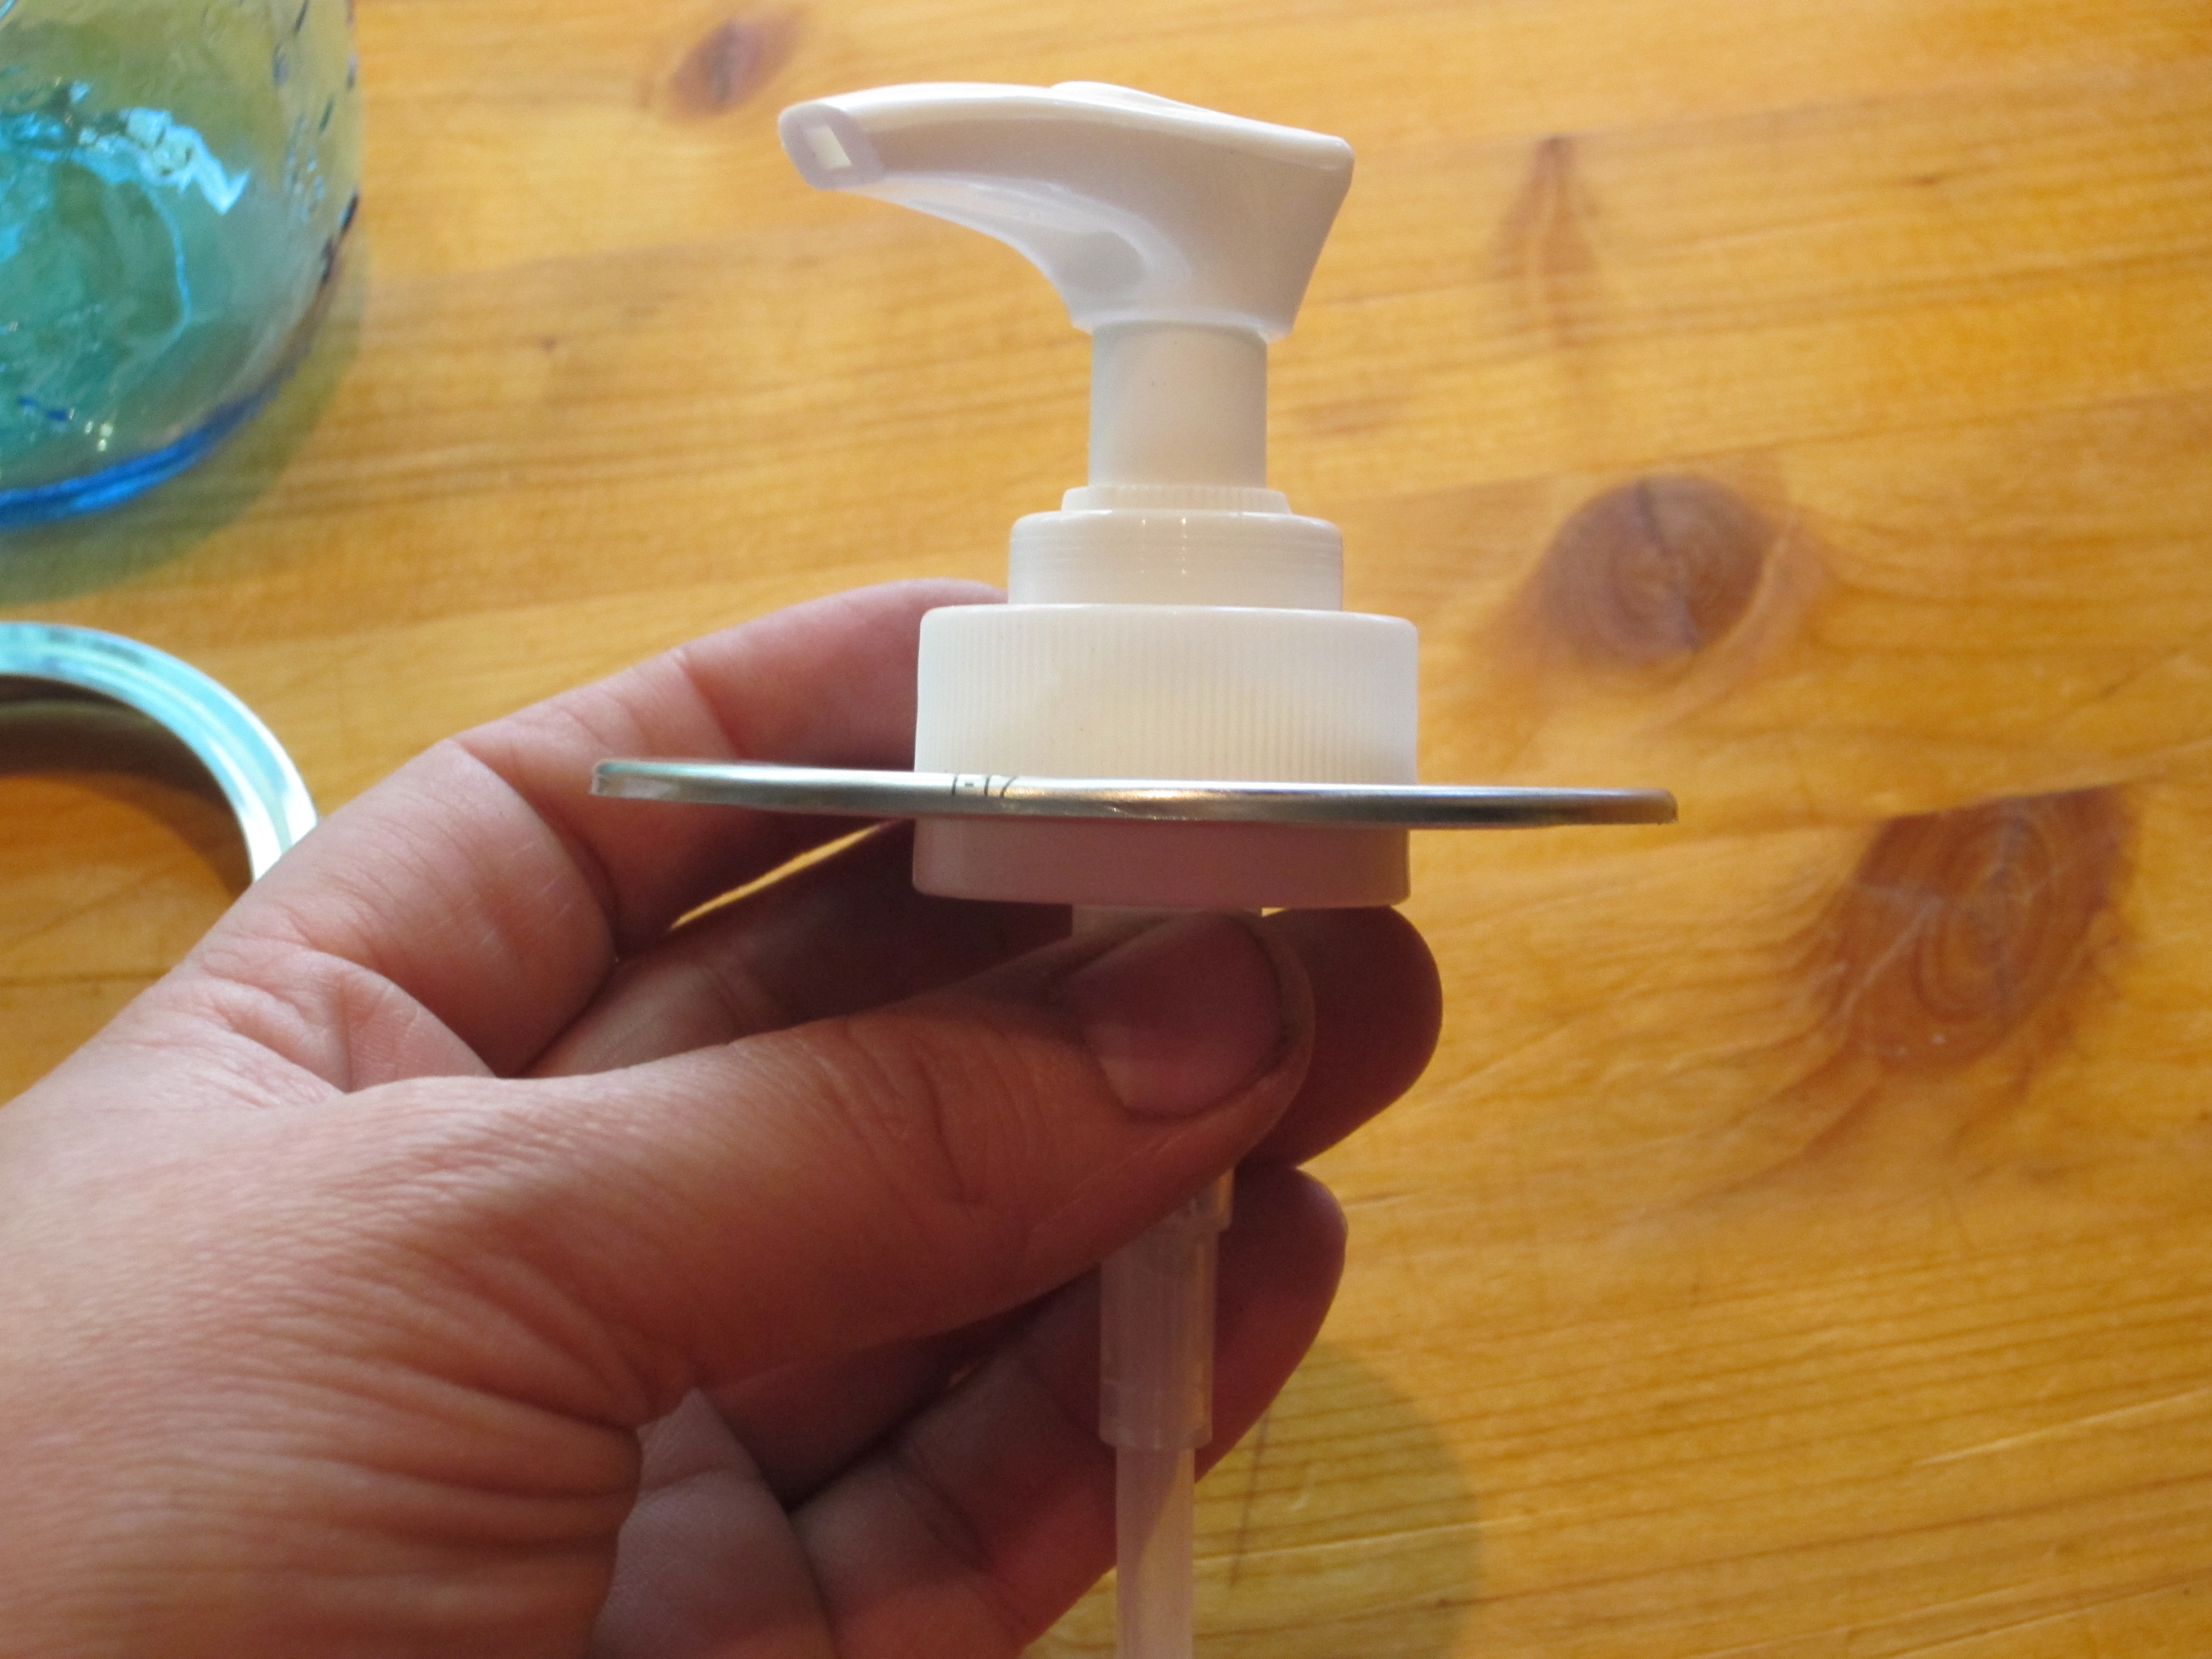
Next, you will need to trim the tube to fit the size jar that you used, being sure to trim it at a slight angle. (Sorry, I did not take a pic of this step.)
Fill your jar with your desired soap, place your dispenser onto the top of your jar, screw the band in place, and you have a beautiful soap dispenser!

*This Post contains affiliate links!*
This post is linked to:
Heritage Homesteaders Blog Hop
Share this:

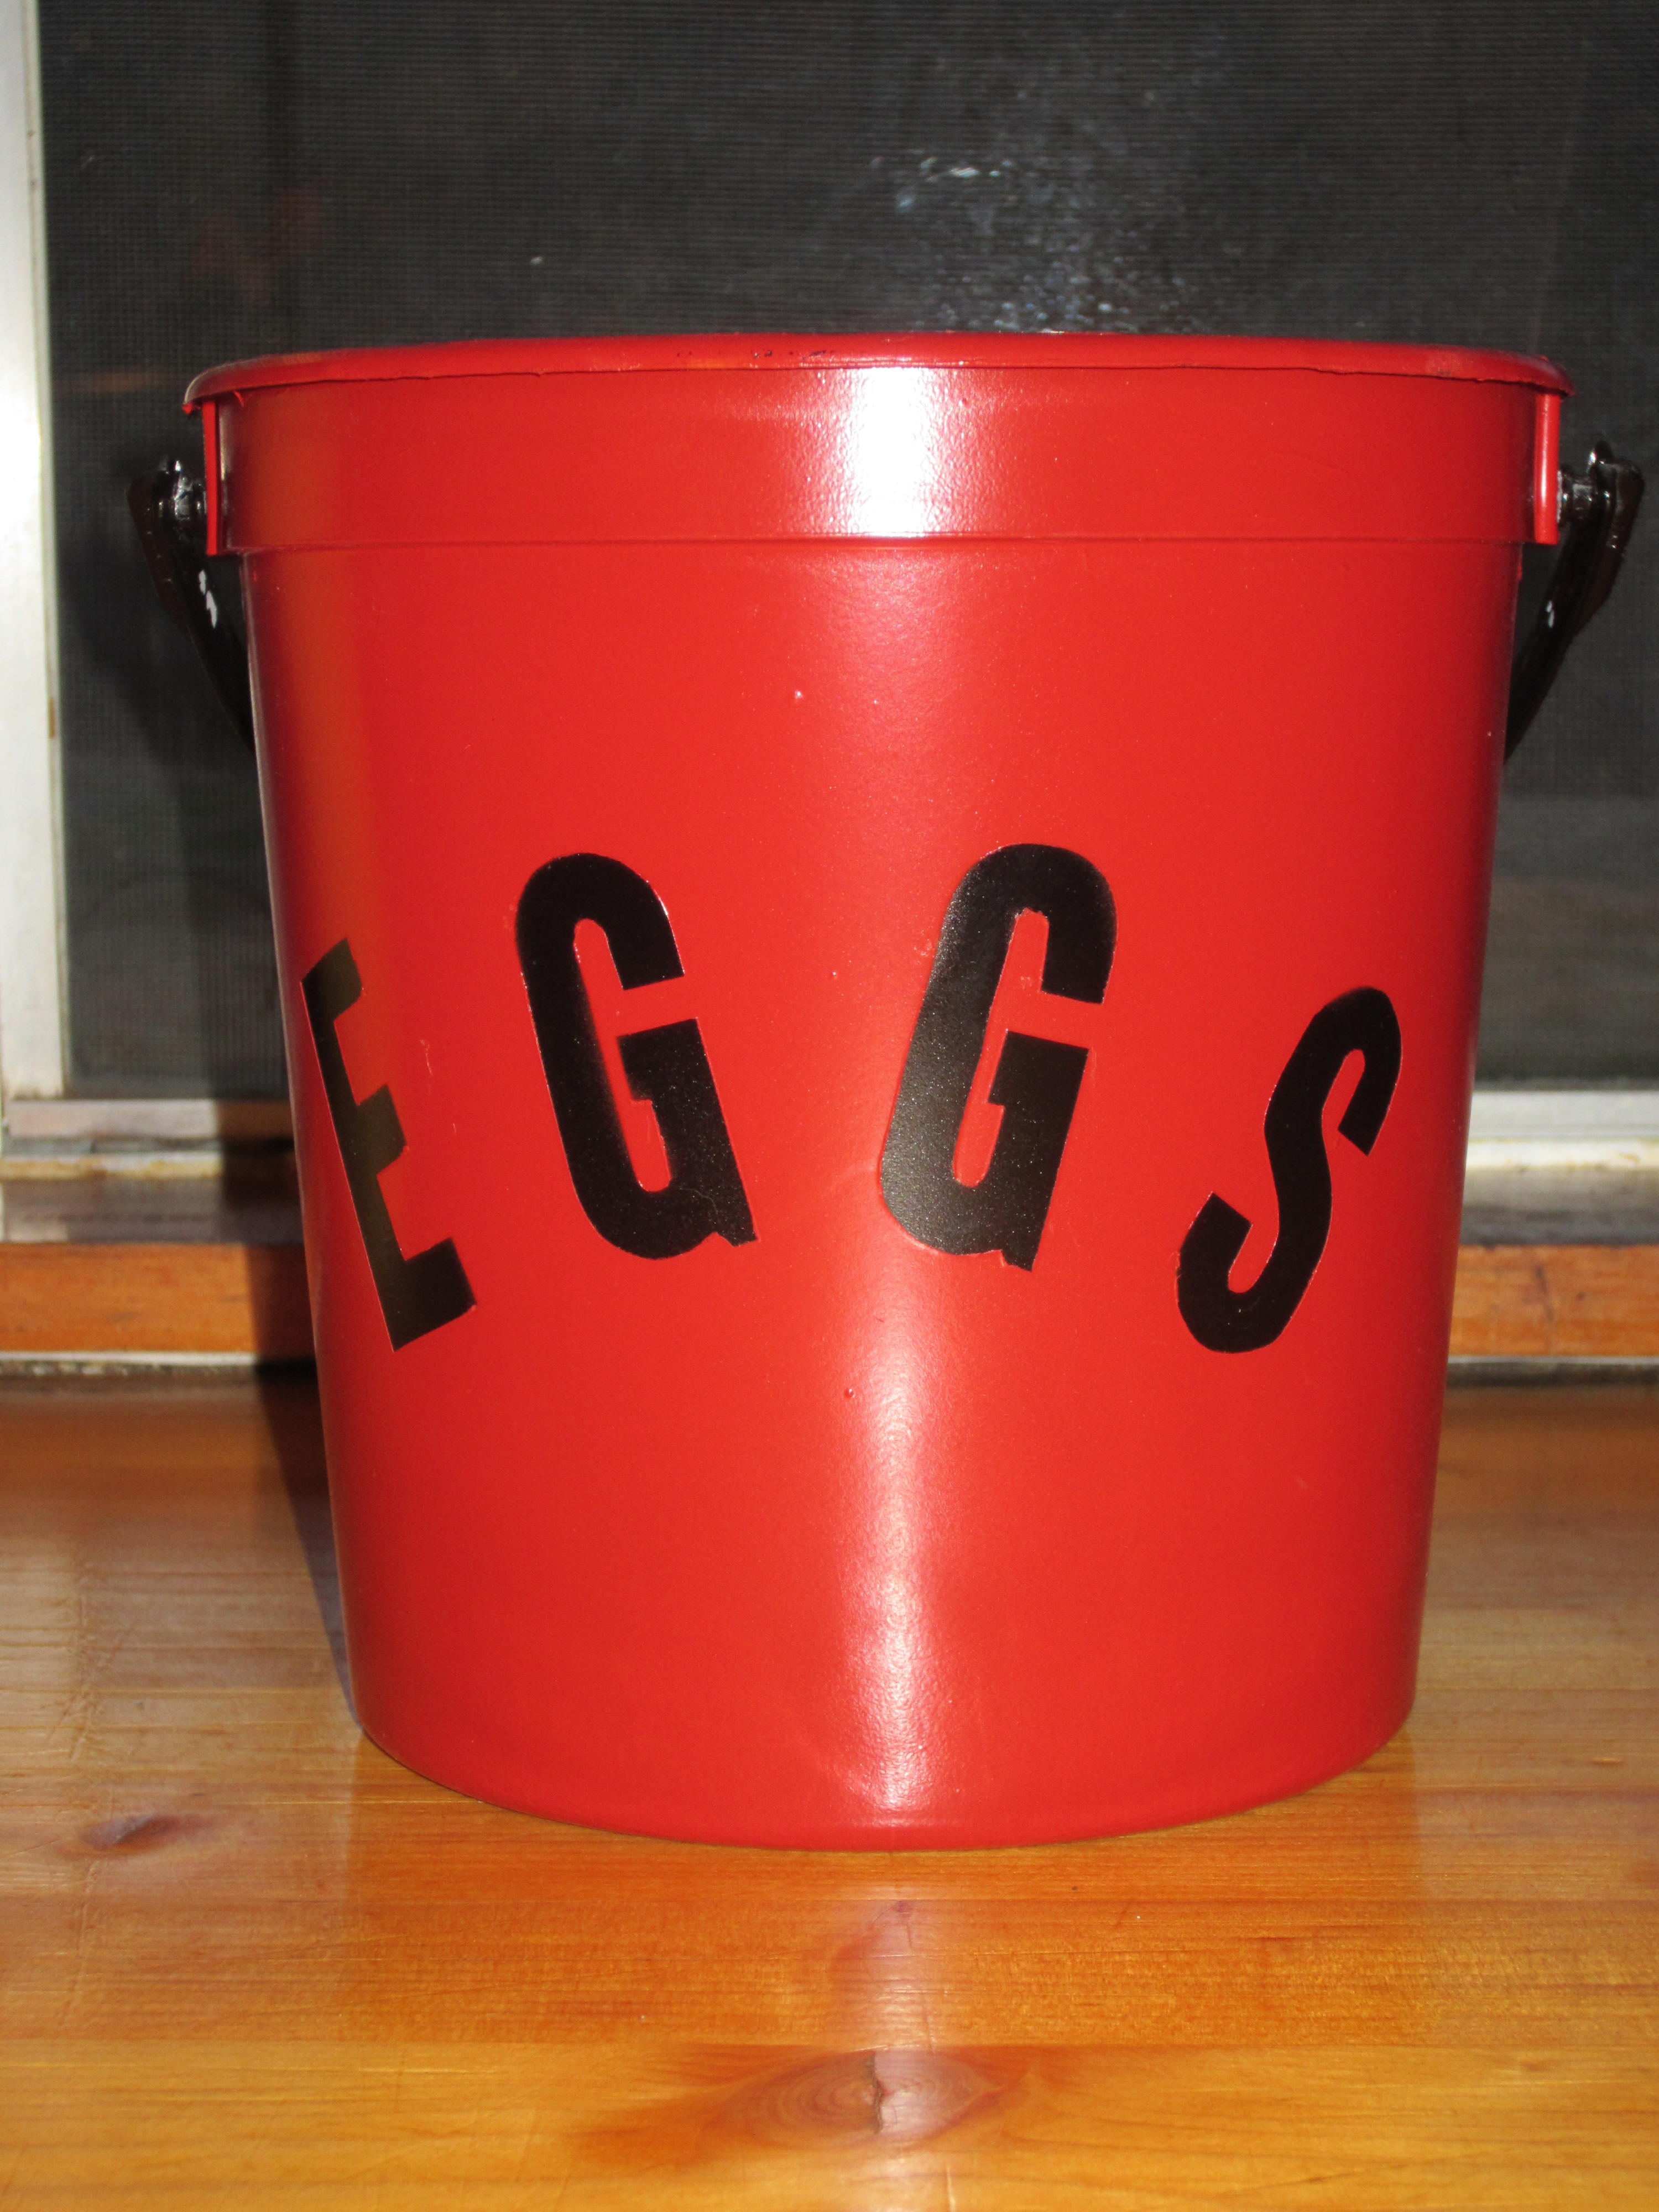
How to Repurpose A Lard Bucket, otherwise known as “My New Egg Bucket”
I had an empty lard bucket that I wanted to do something with, and then I had a brilliant idea!
All you need is:
Krylon Paint for plastics (I used black and red)
An empty bucket
A few stick-on letters
A little time!

Start by removing the lid and handle from the bucket.

Next, give it a good washing in hot soapy water. You’ll probably need to wash it a few times. Once it’s nice and clean, allow to completely dry.

Take outside and spray paint desired color. You will probably need to paint a darker bottom to hide all the colored inks in the bucket itself. I used black as the bottom coat on mine. I also painted my lid and handle black. Once dry, I placed the letters where I wanted them & began painting my second color. I painted both the inside & outside of my bucket red.
Once it was completely dry, I brought it inside & reattached the handle.
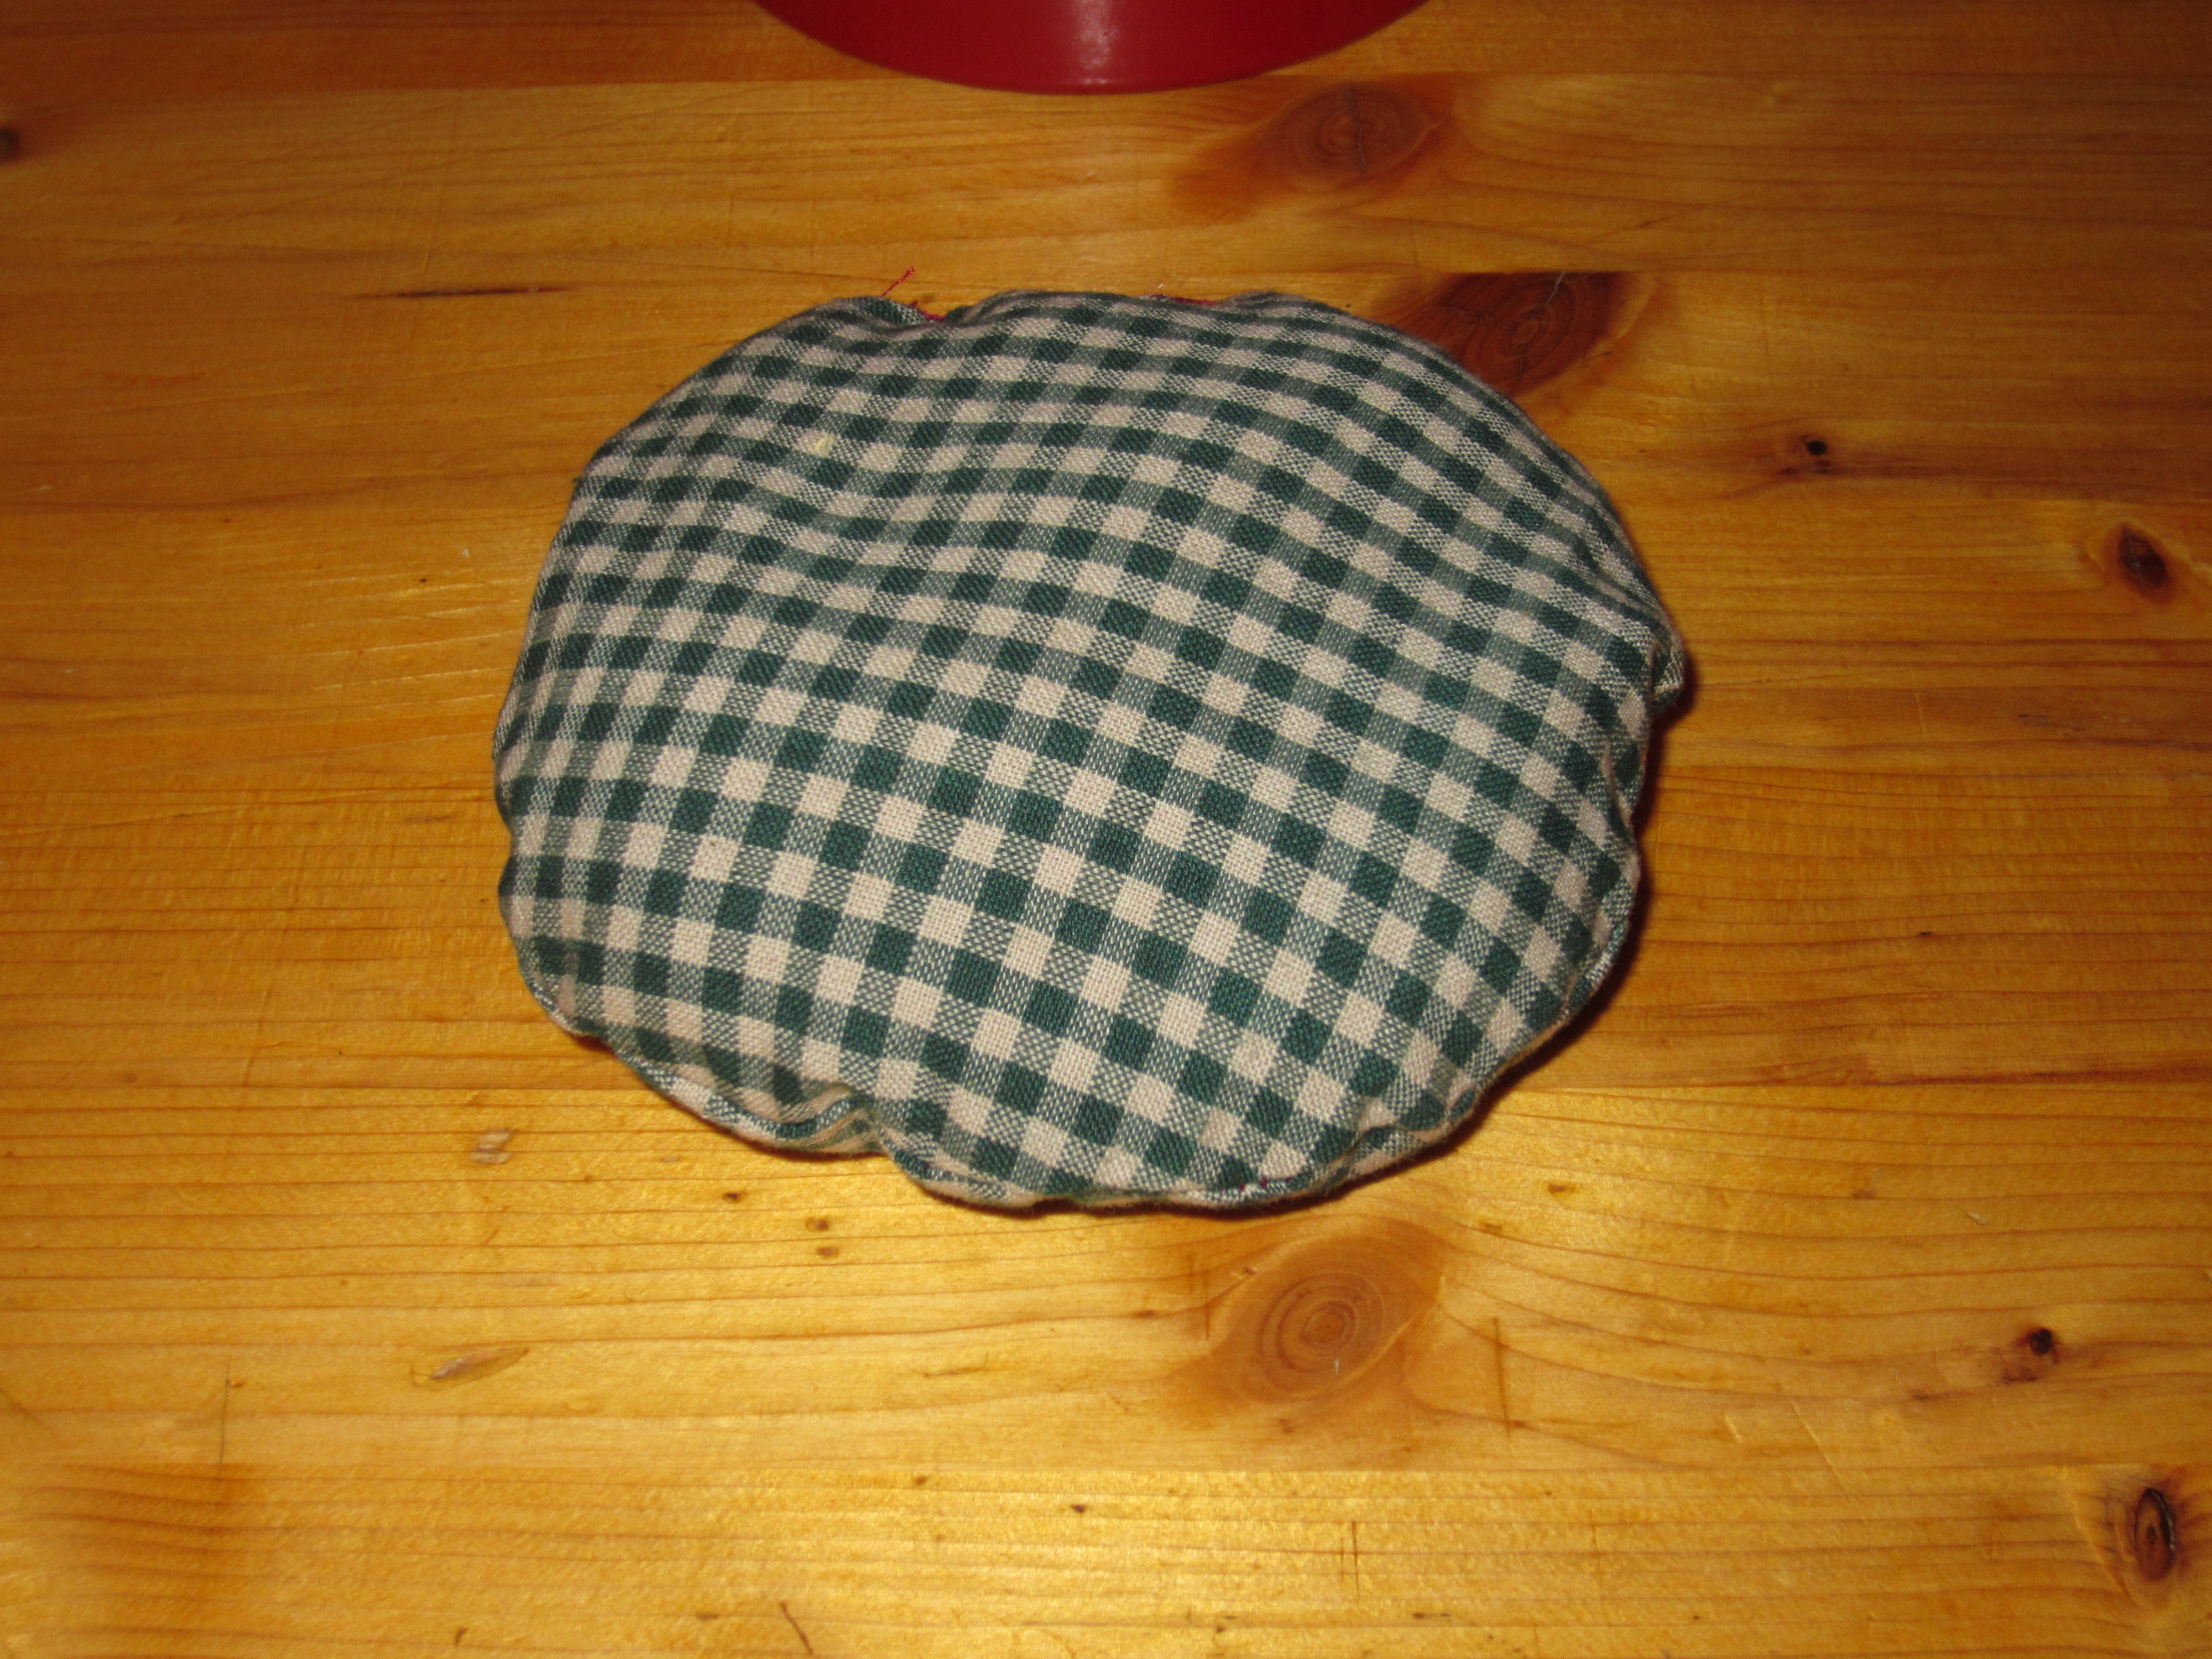
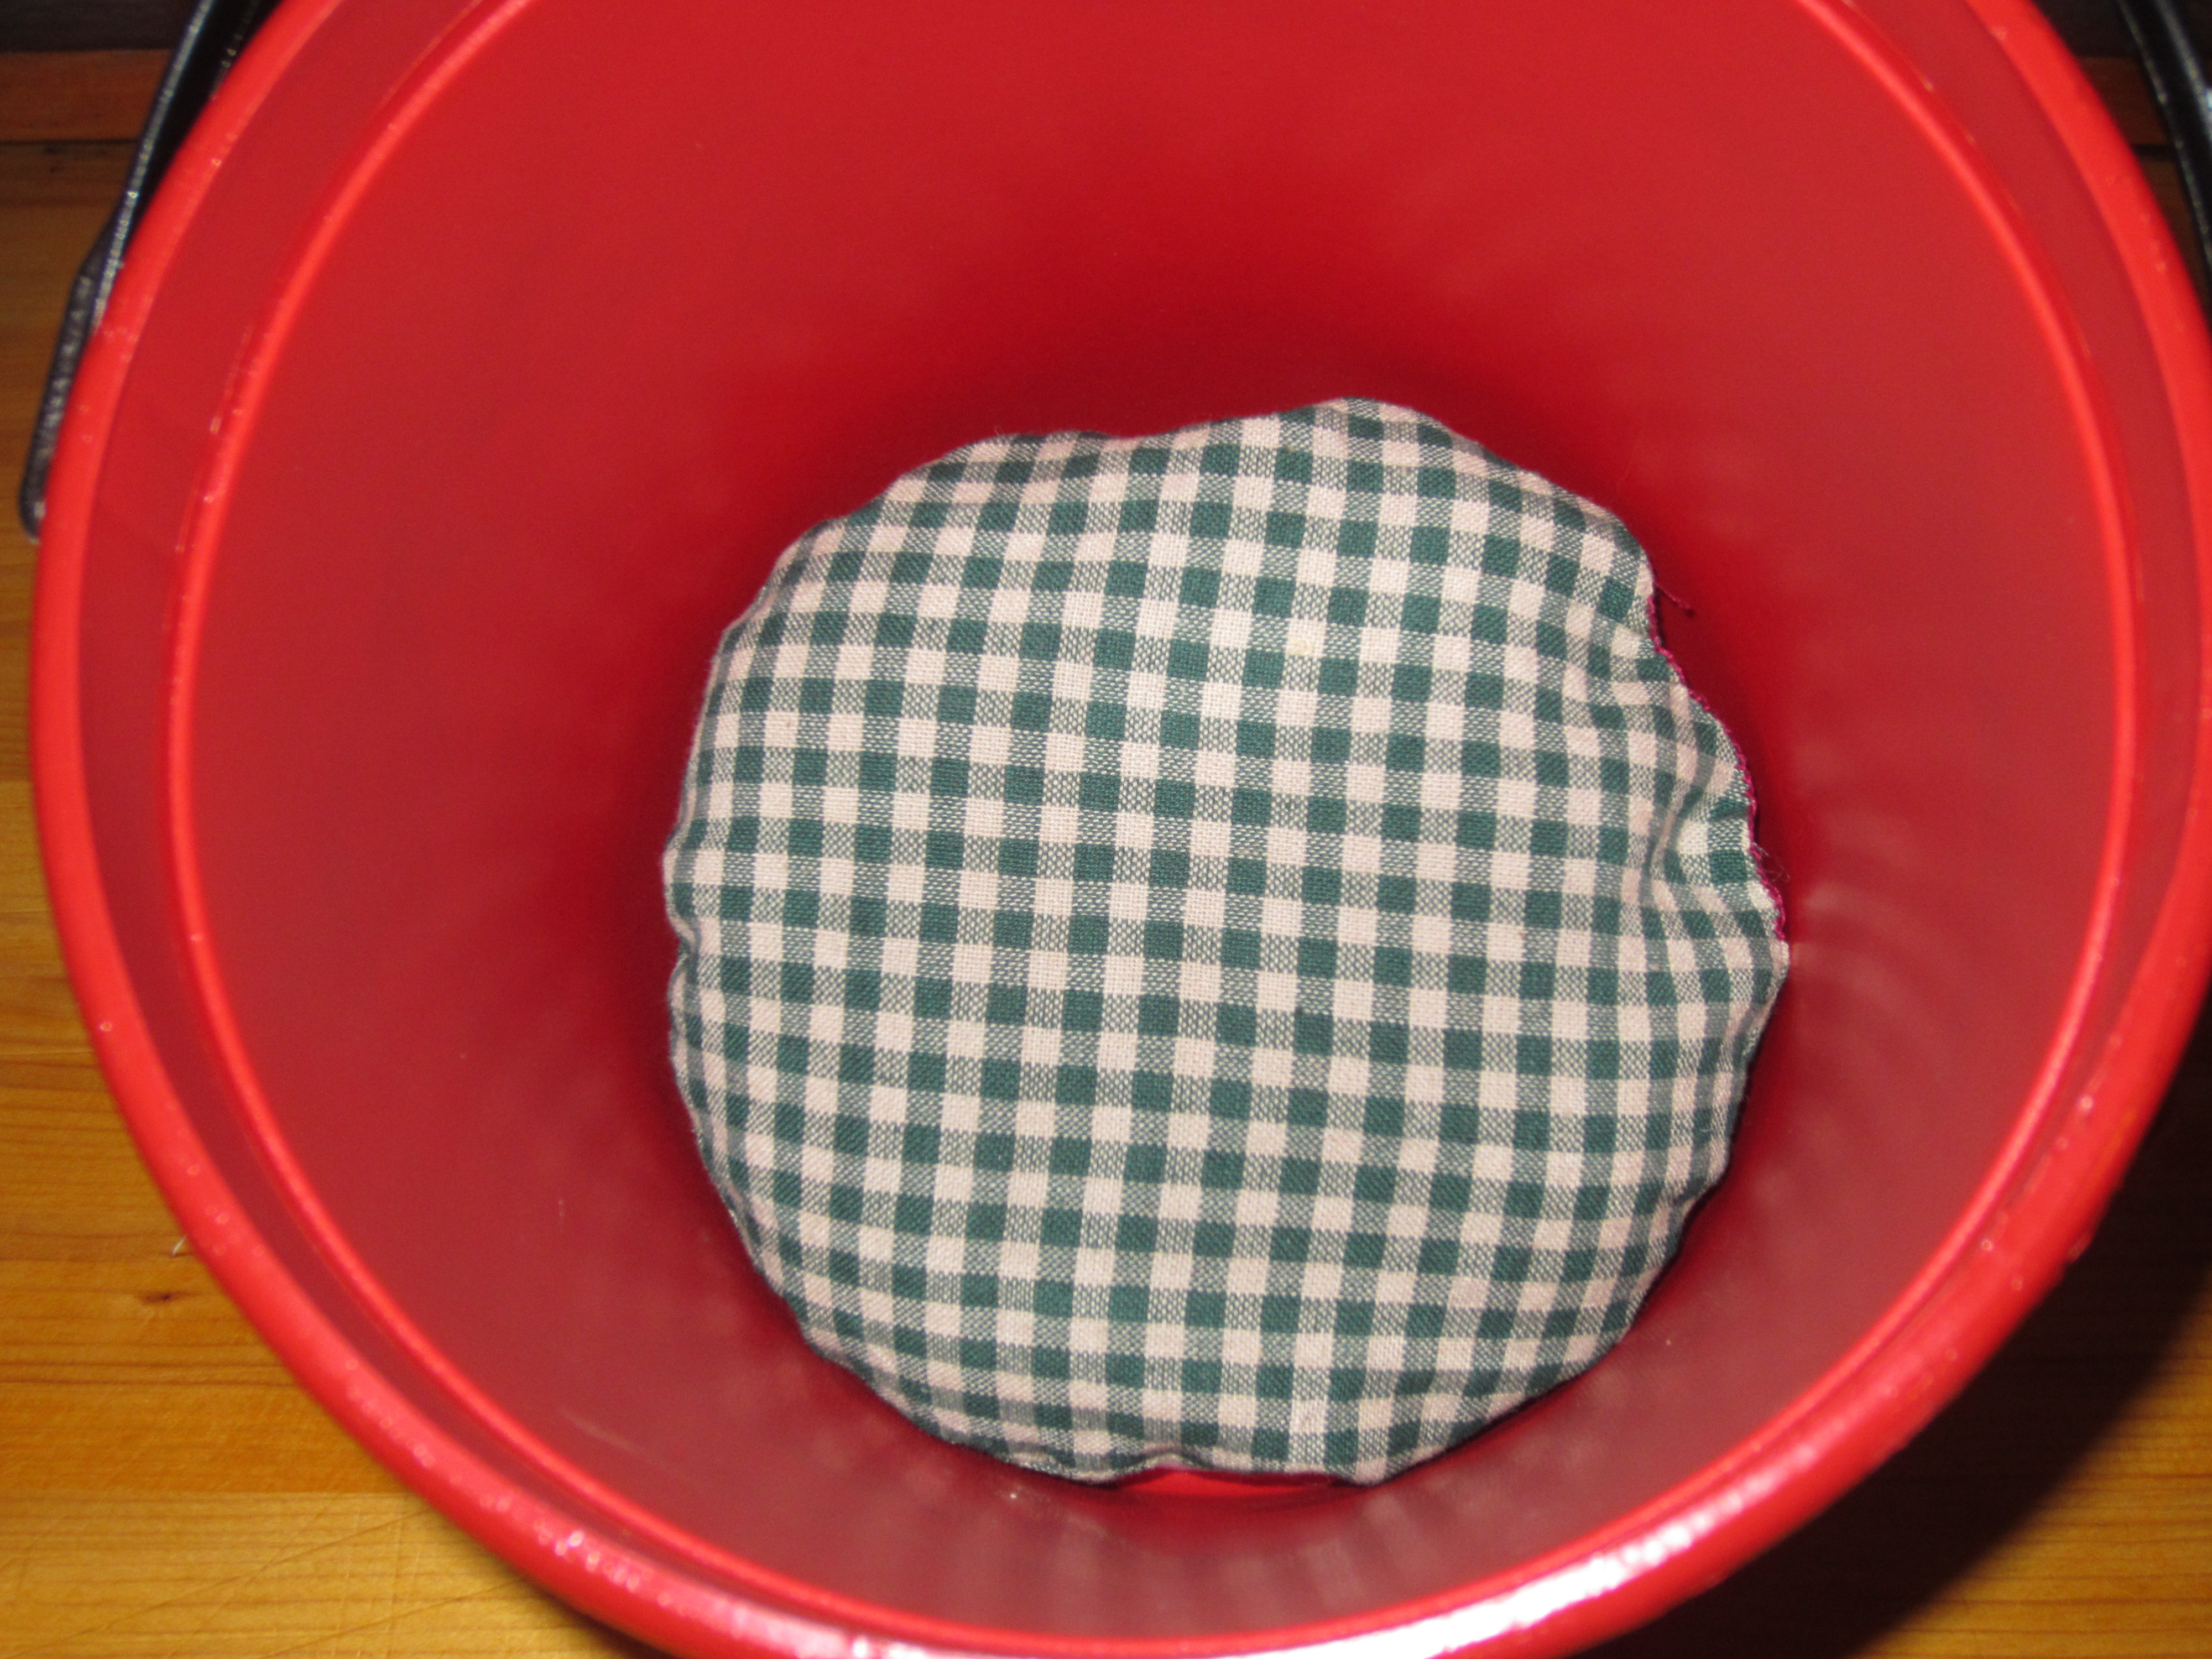
I also made this little “cushion” to go in the bottom of the bucket to keep the eggs from making contact with bottom of the bucket – hopefully to keep down on any “accidental” cracking of the eggs.
Voila! My new egg bucket! I love it!
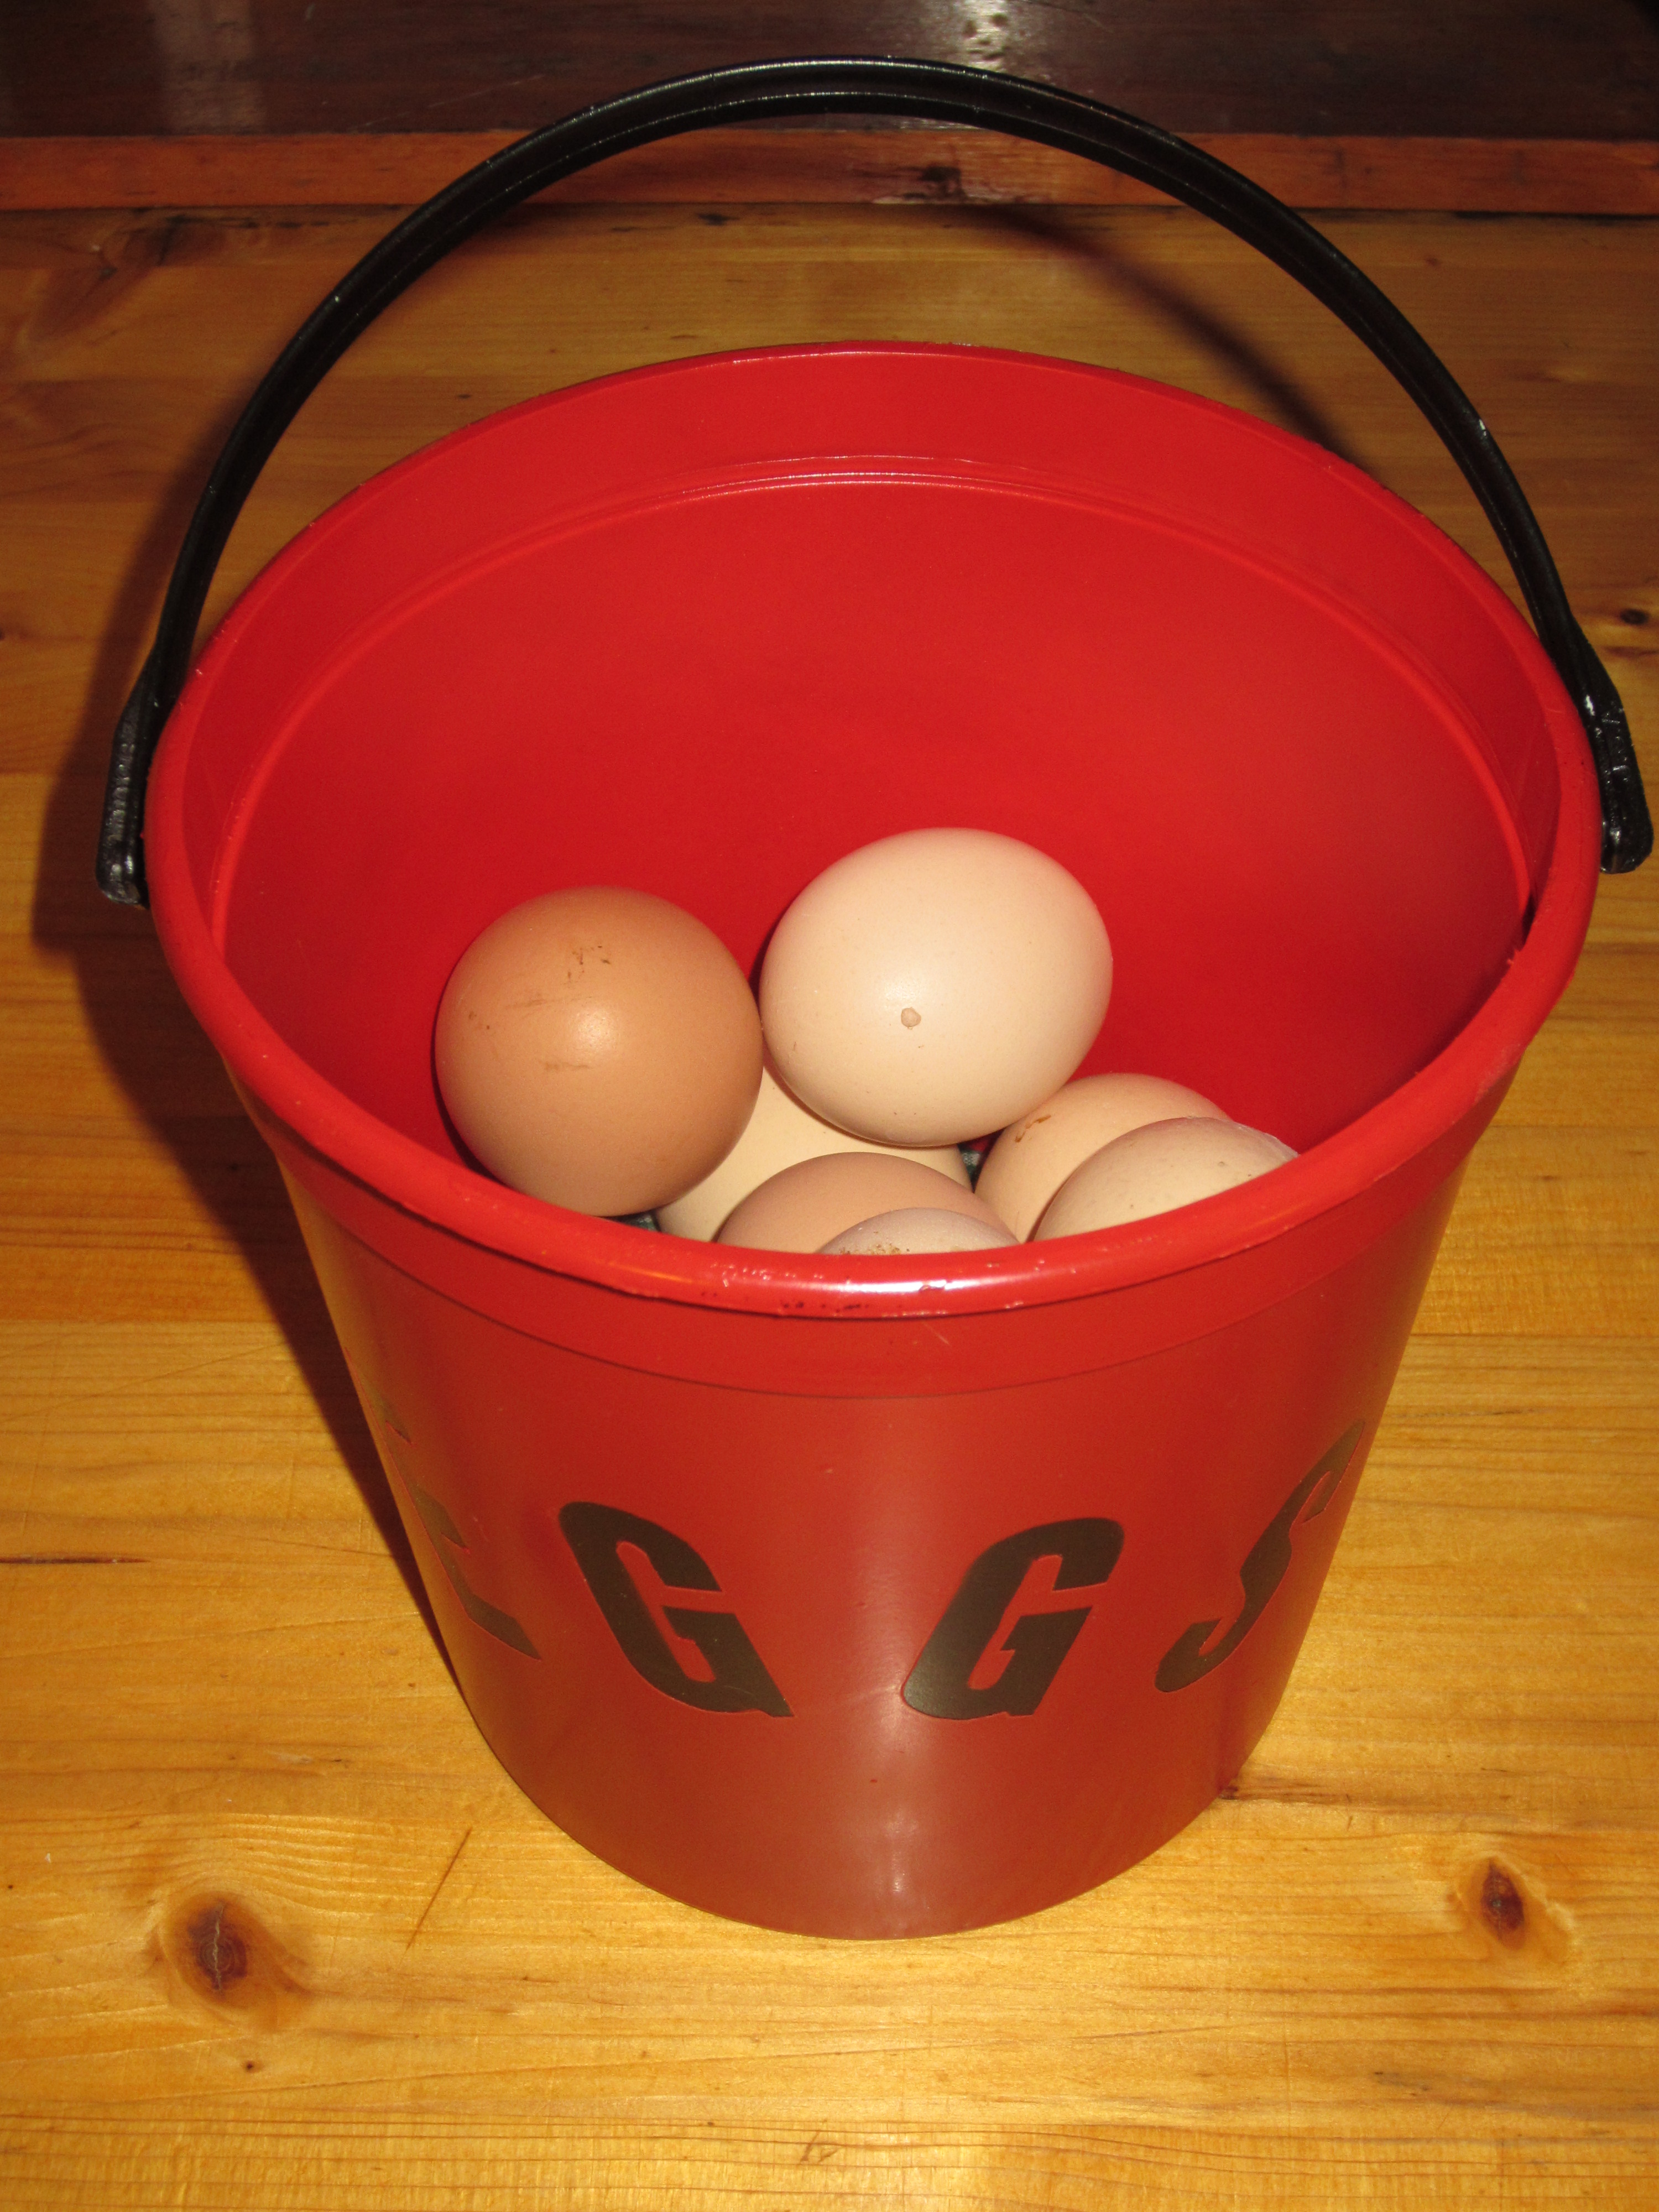
I may just have to make a few more of these as I come across empty buckets!
This post is linked to:

