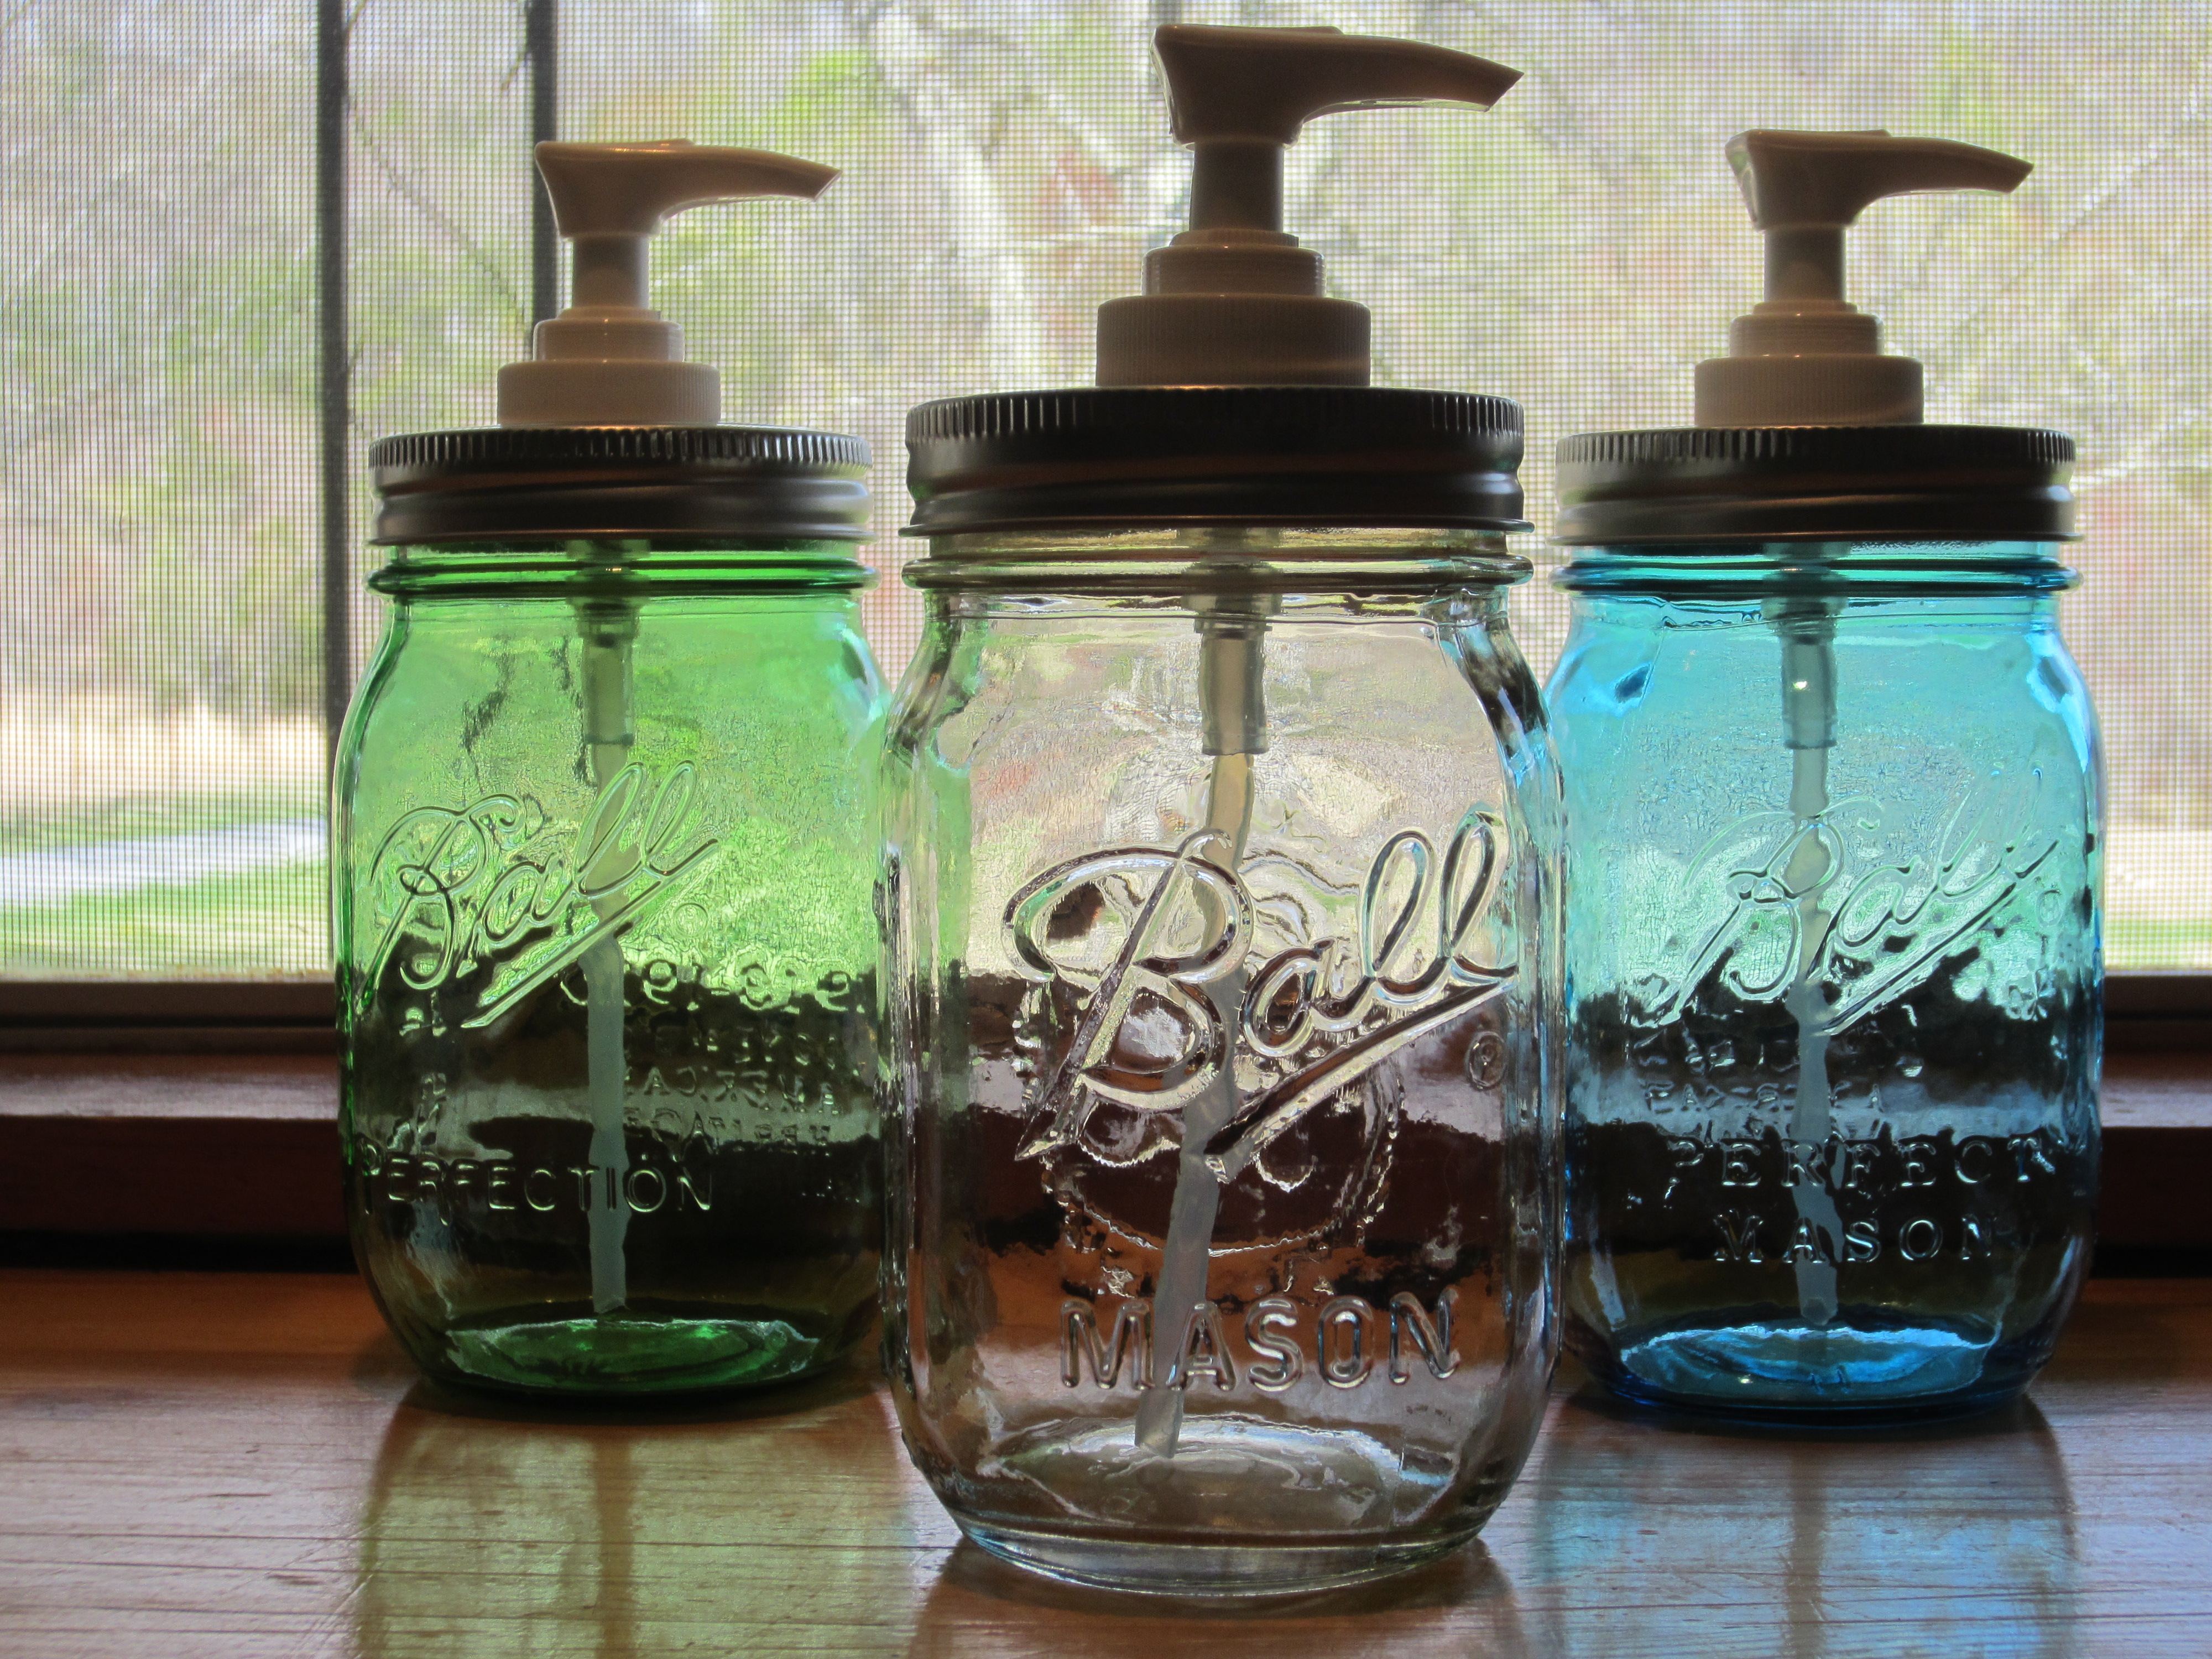
Jar Soap Dispenser Tutorial

Jar Soap Dispensers

Jar Soap Dispensers

I’ve been wanting to make these for quite some time now.  I had ordered the soap pump dispensers a few weeks ago, but just had not had the time to get around to making them until this week!  My sweet hubby gave me a helping hand and we had all six done in no time flat!


Here are the items that you will need to make your own mason jar soap dispensers:


IMG_2159

Soap Pump Dispensers

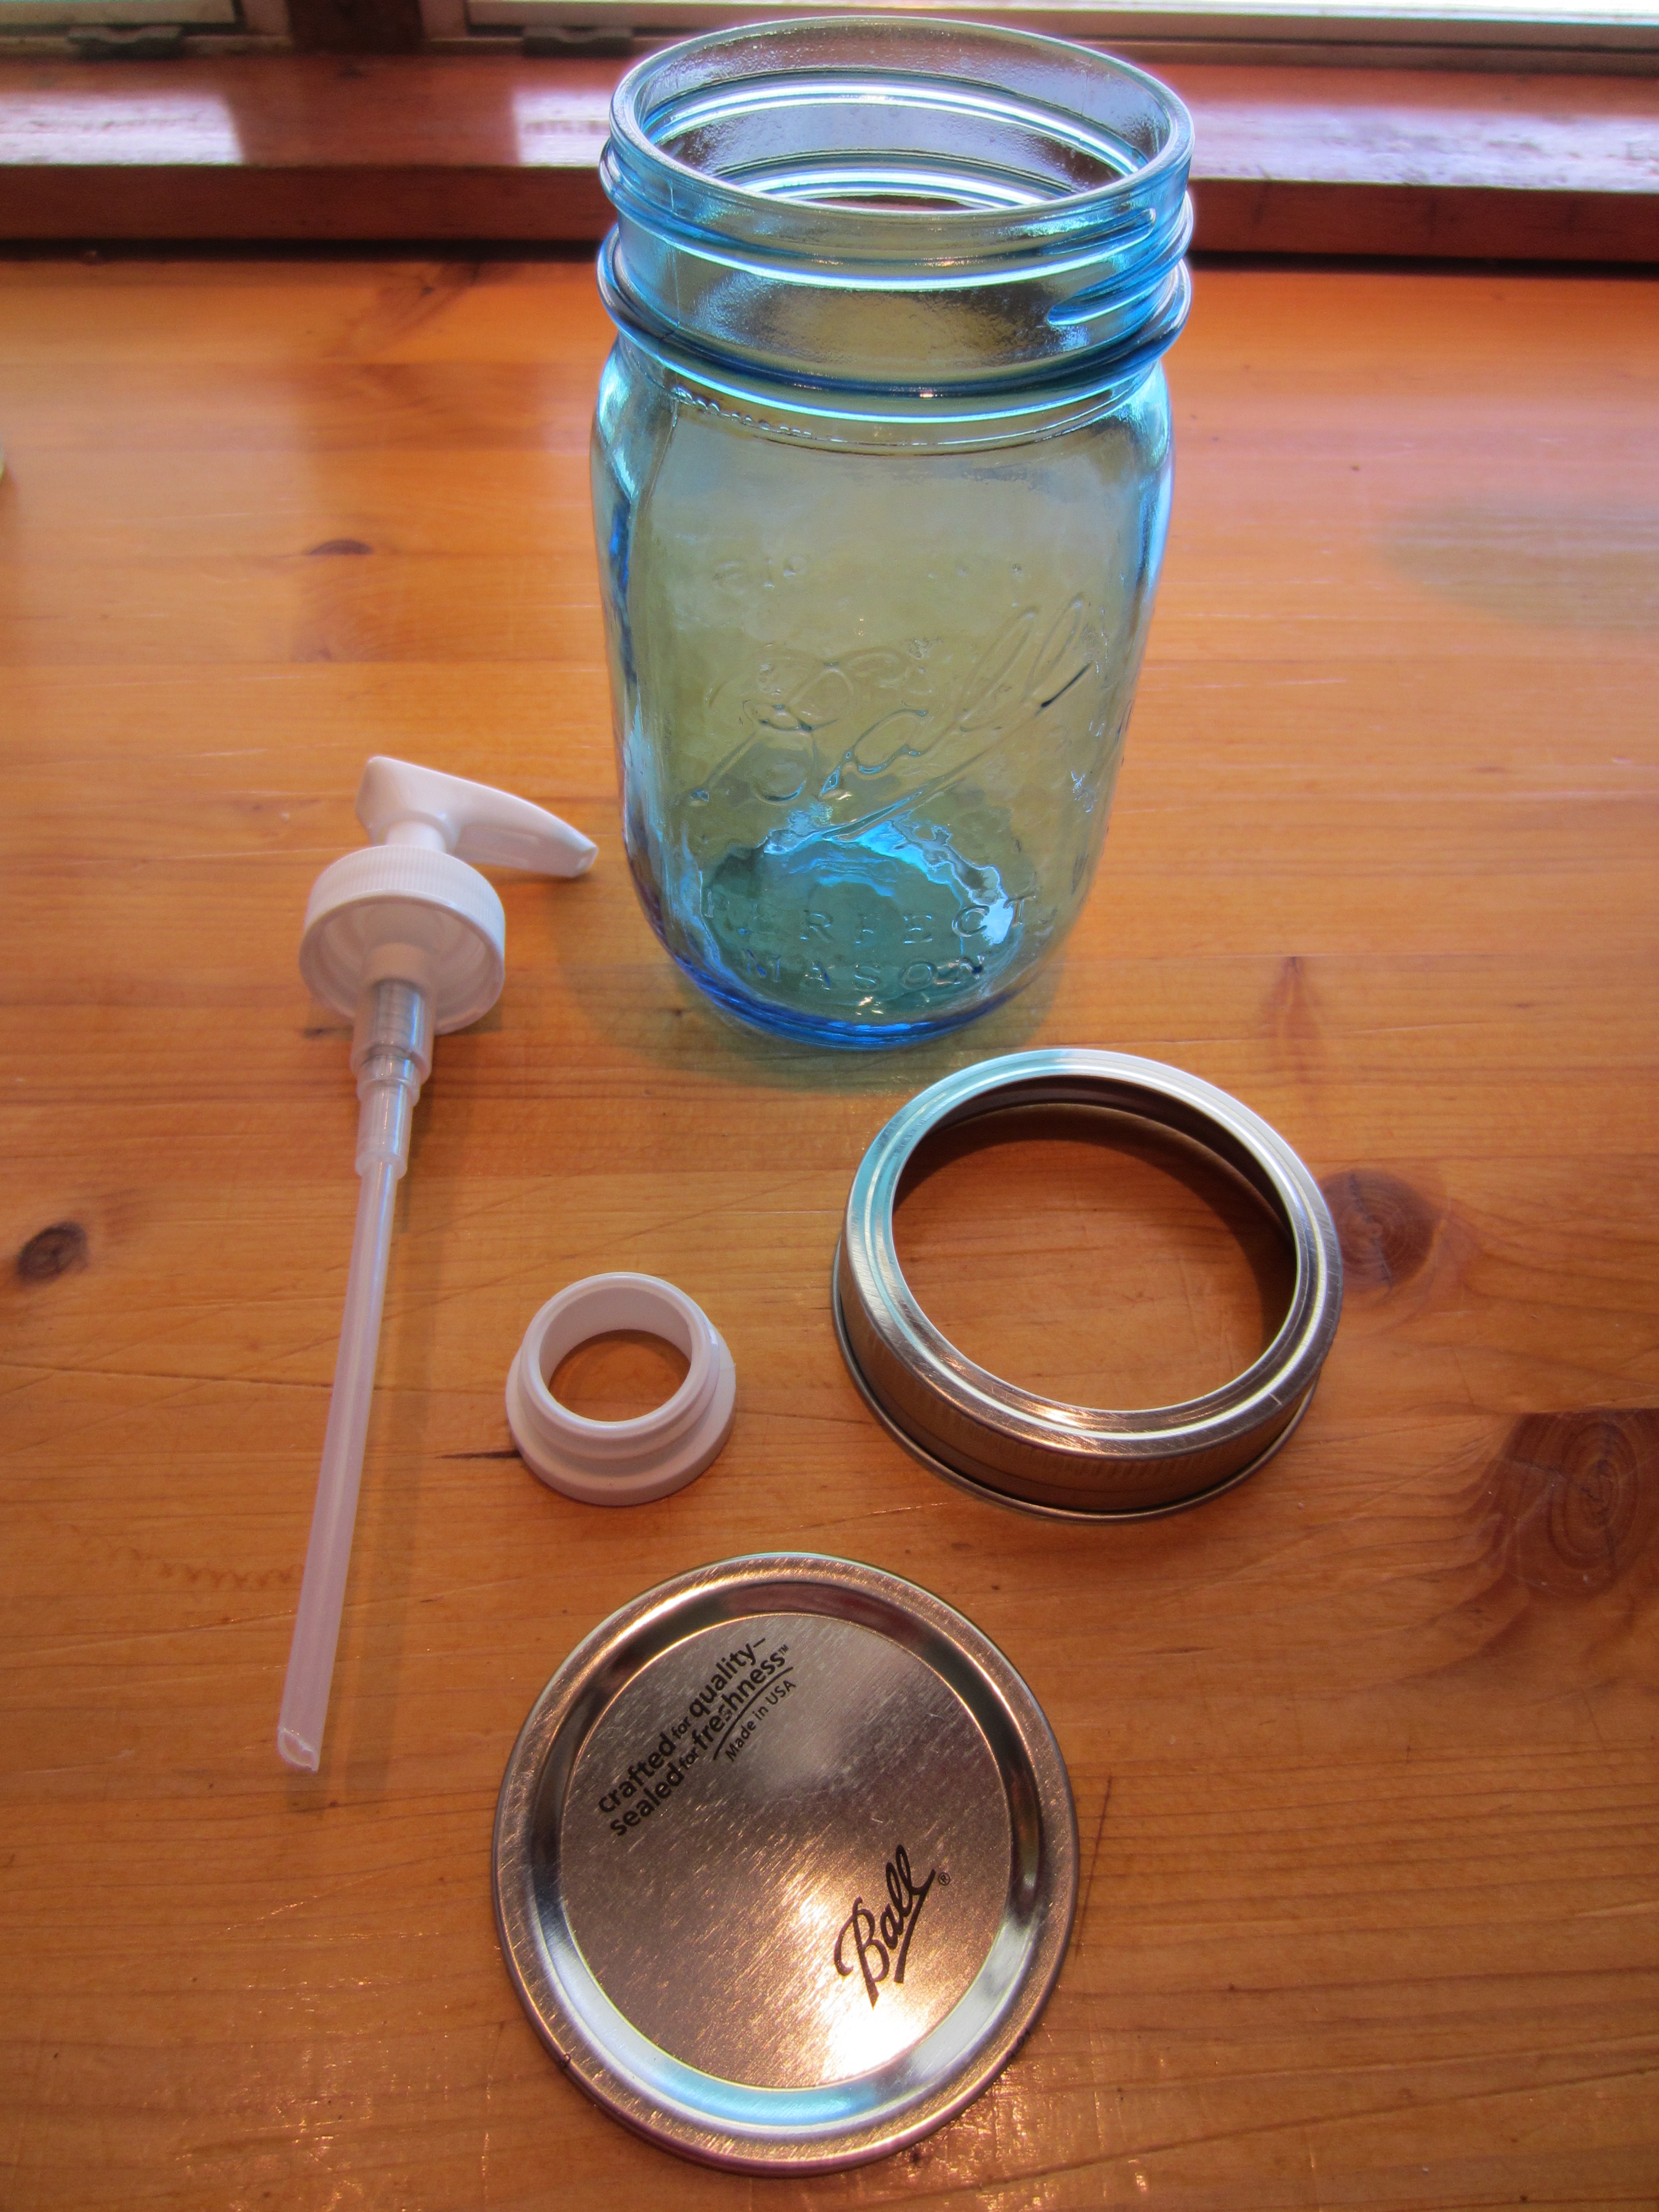
Ball Mason jars (Any jar will do, but they do have blue and green jars available now!)
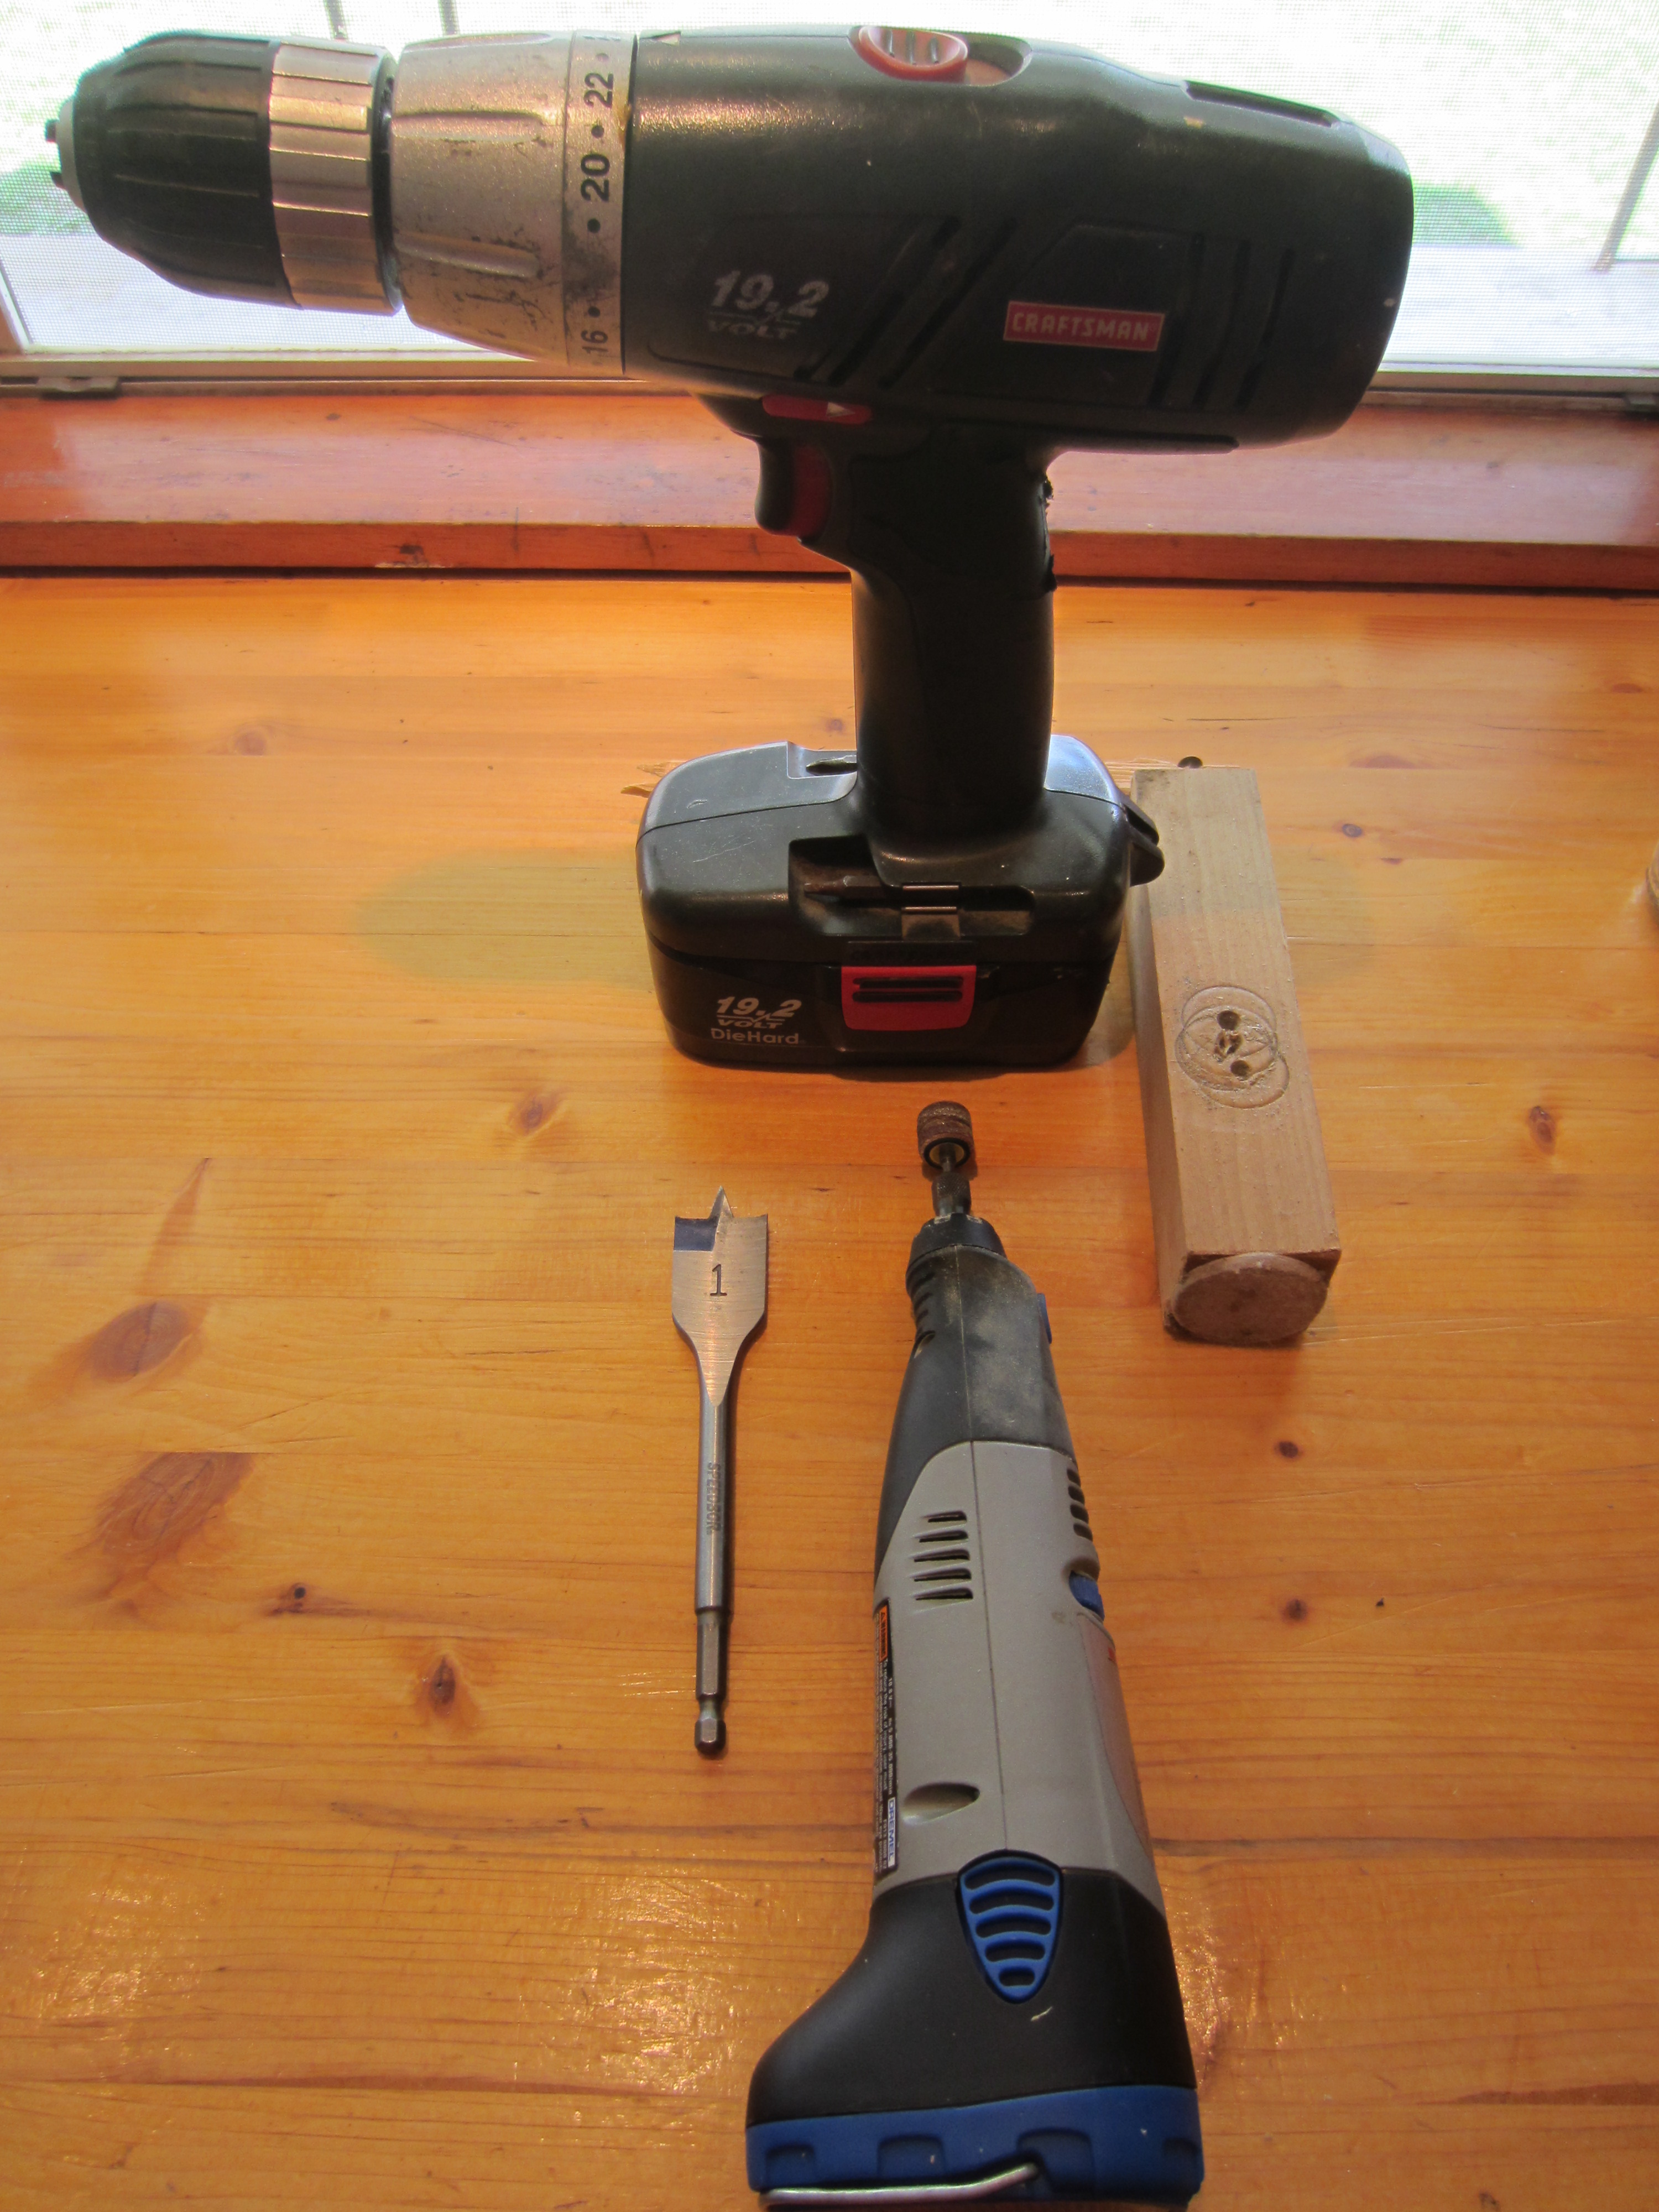
Jar lids & bands

IMG_2160

Drill

1-inch paddle drill bit (1-1/8-inch drill bit is pretty much the perfect size, but a little harder to find)

Dremel


Using the piece of wood, place the lid (aka seal) onto the piece of wood and, being very careful (wear gloves, if you have them), hold the lid tightly.  You will actually run the drill backwards to keep it from grabbing the lid as hard.

IMG_2161


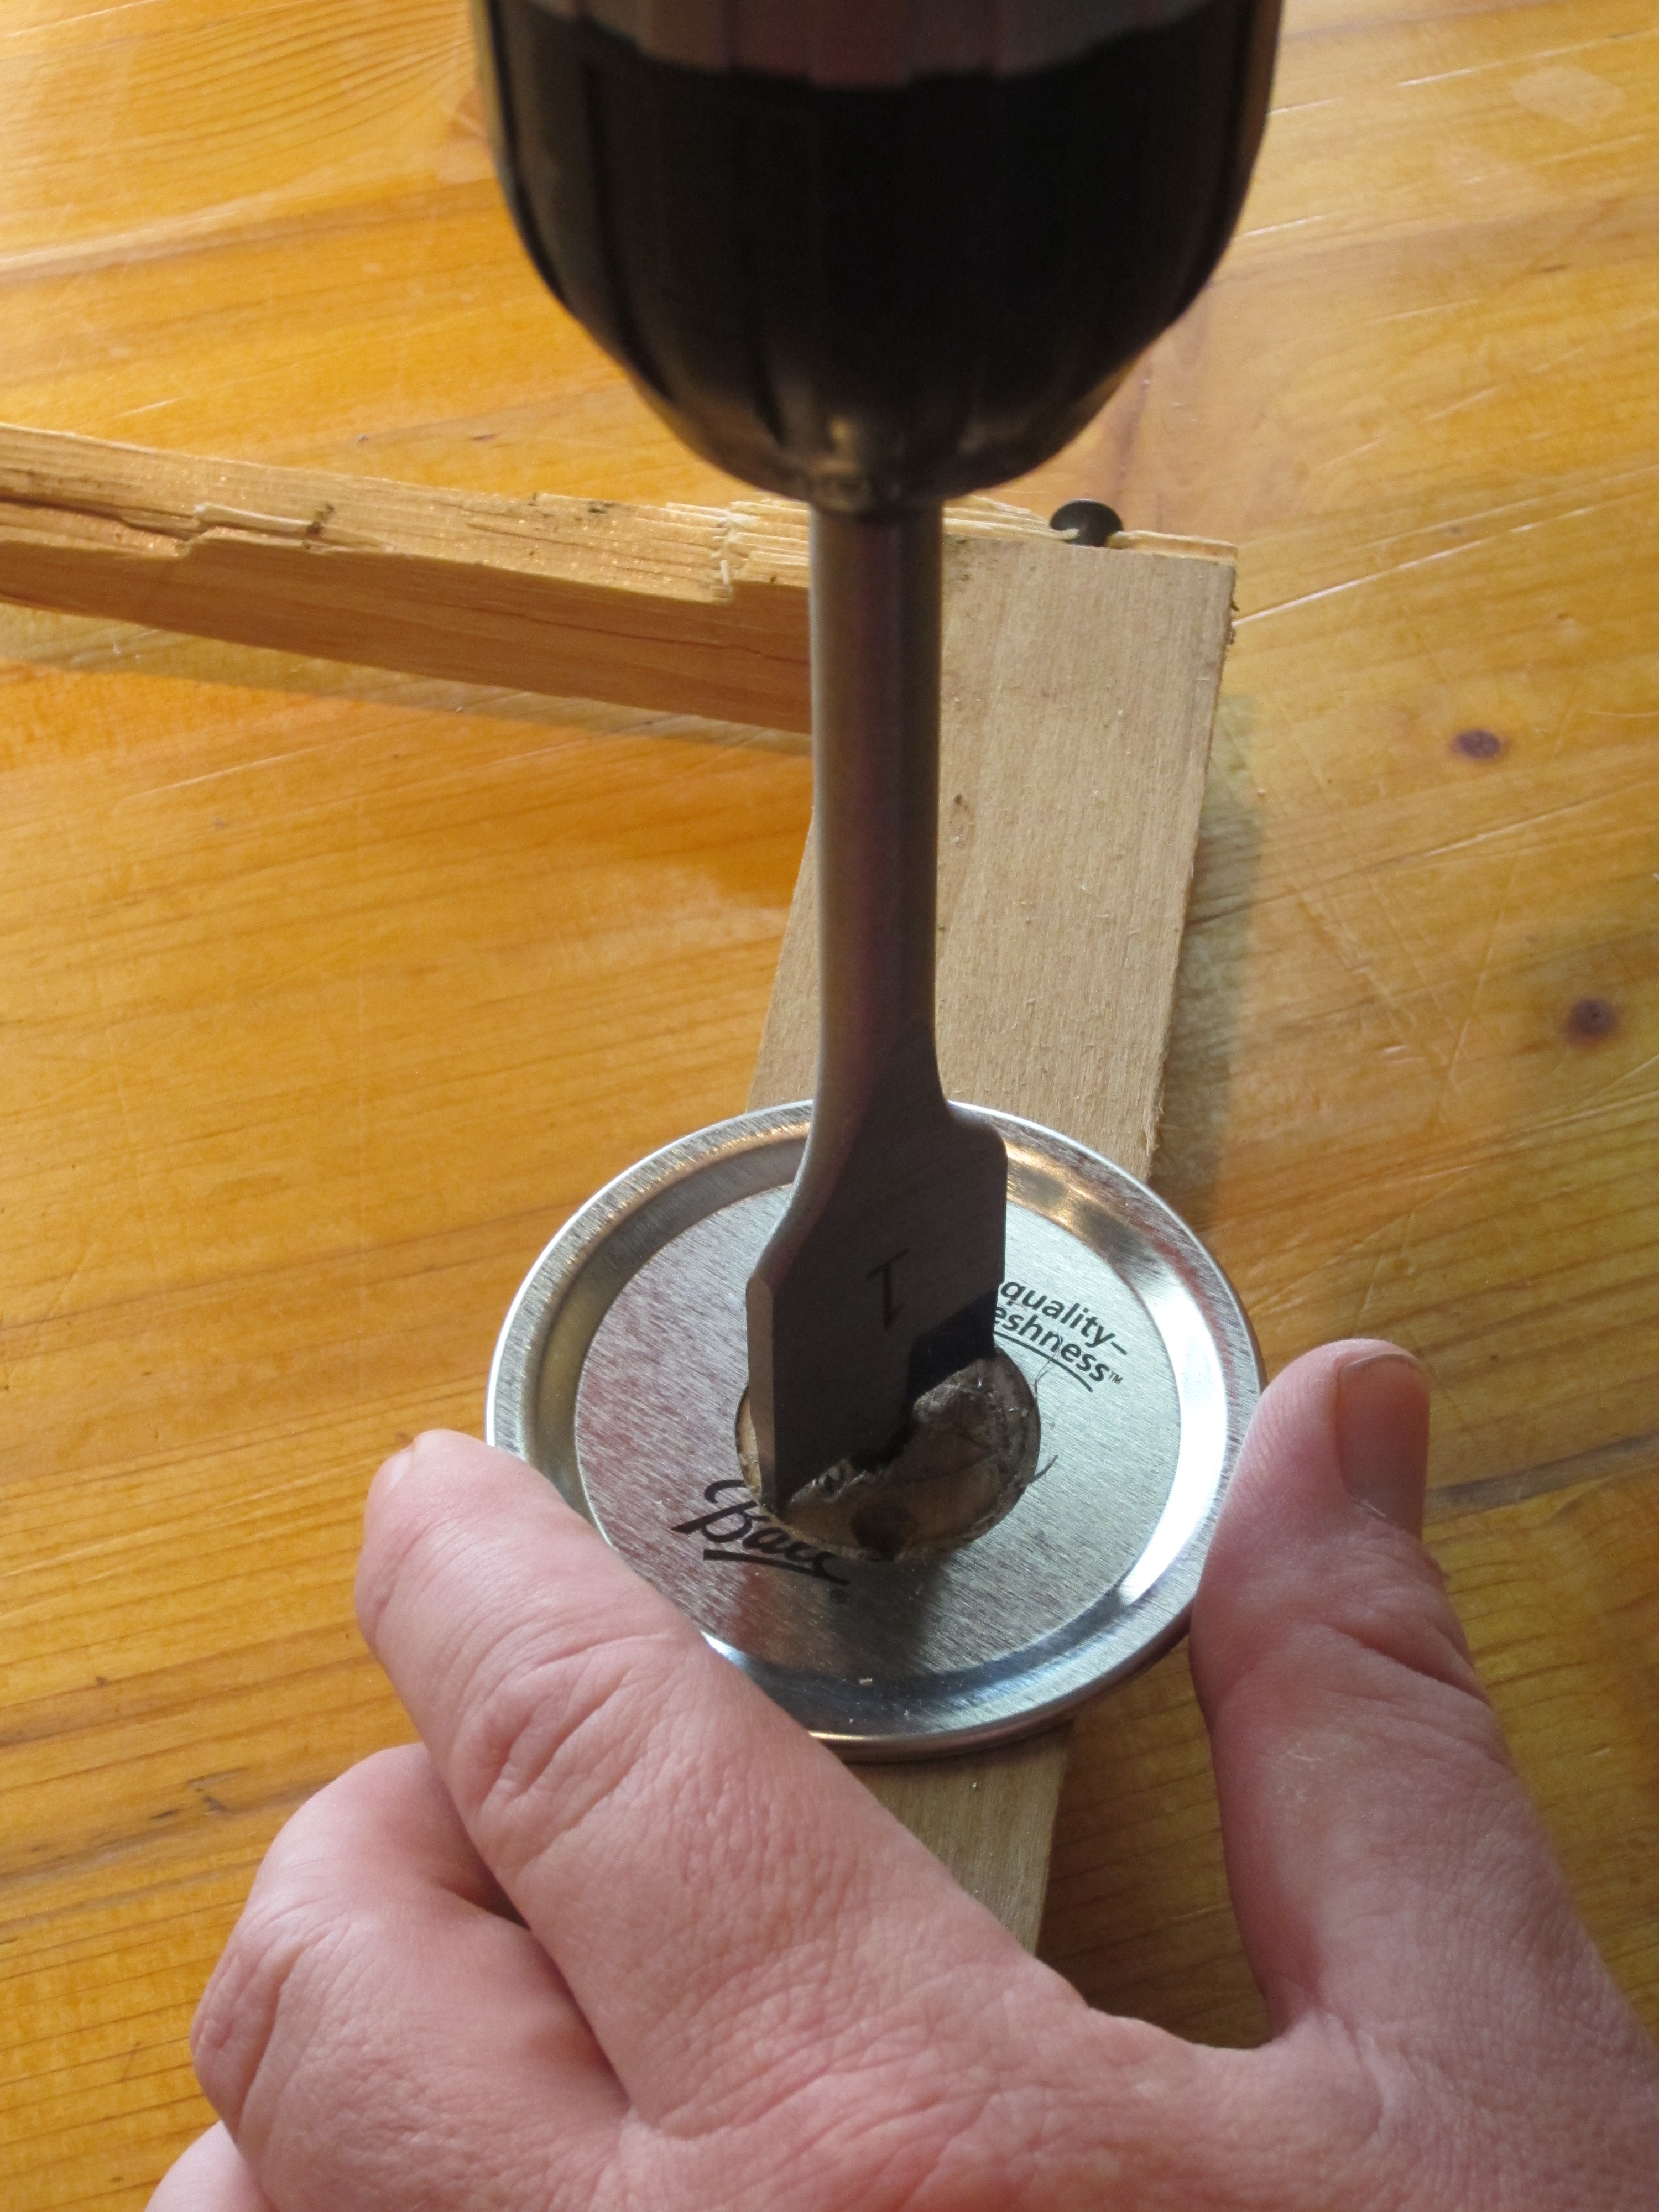
It makes a nice, clean hole without you having to fight to hold the lid in place as  much.

IMG_2165


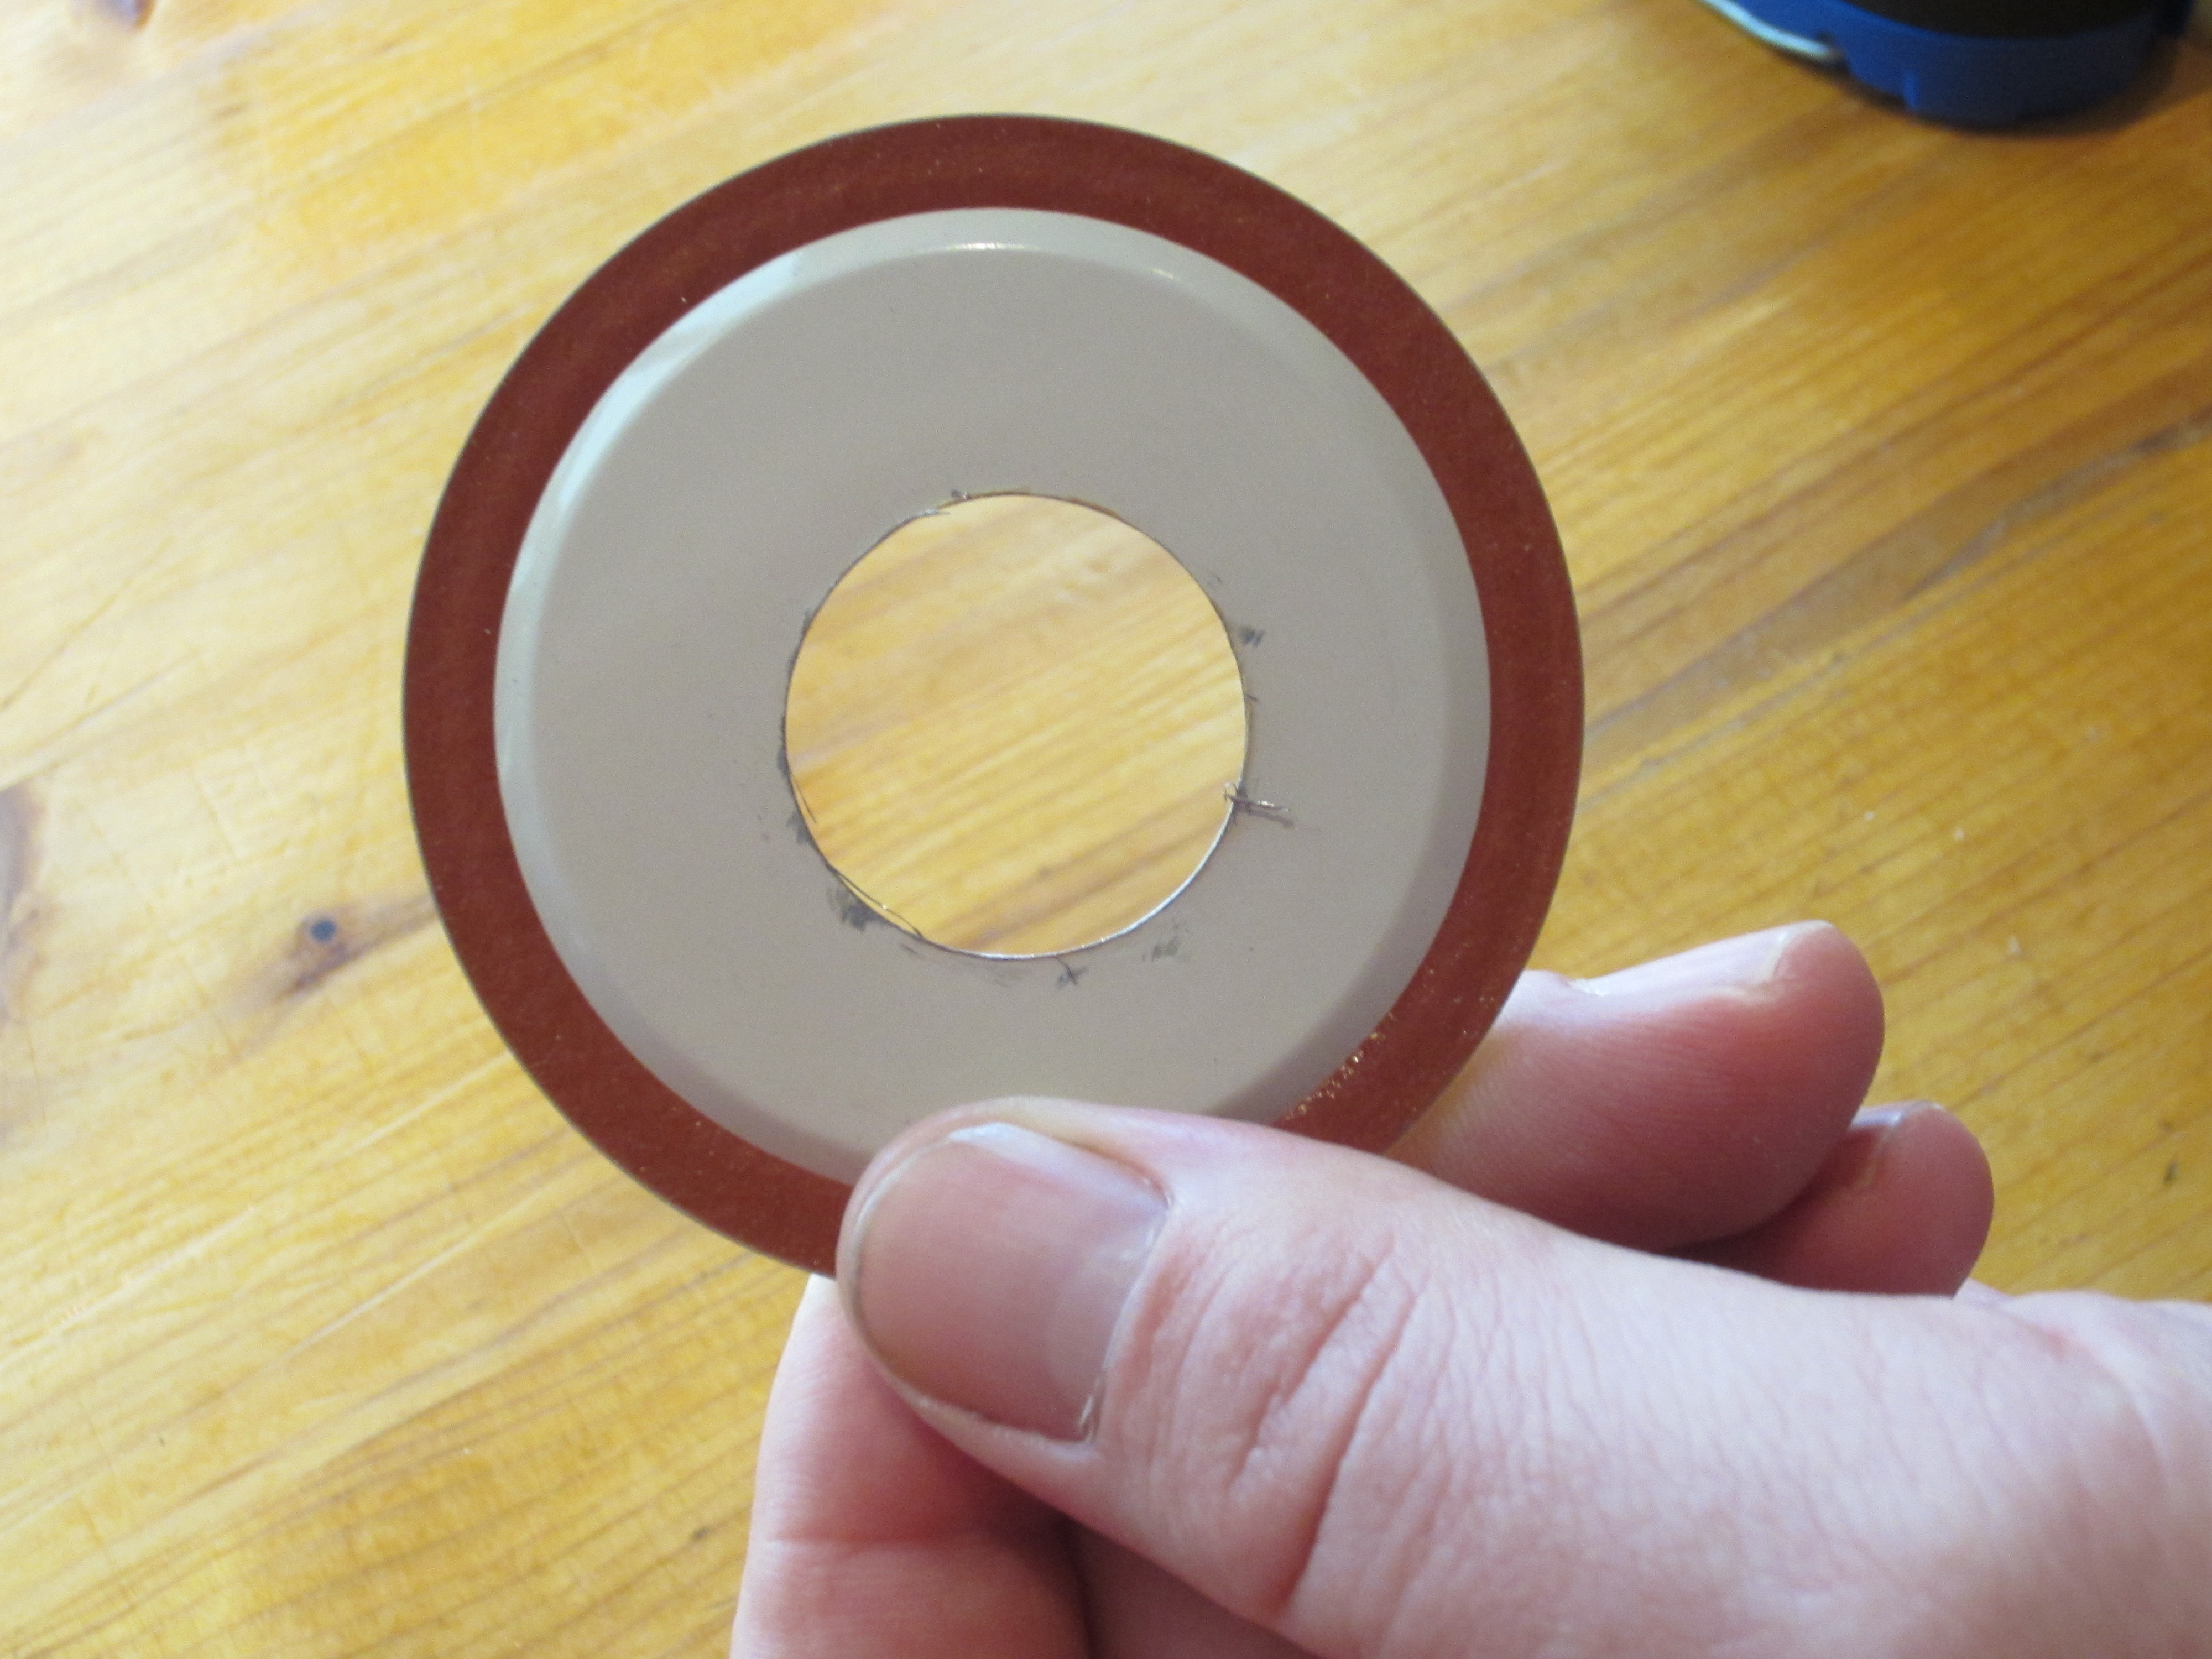
Next, you will want to take the Dremel & file down the edges.

IMG_2163

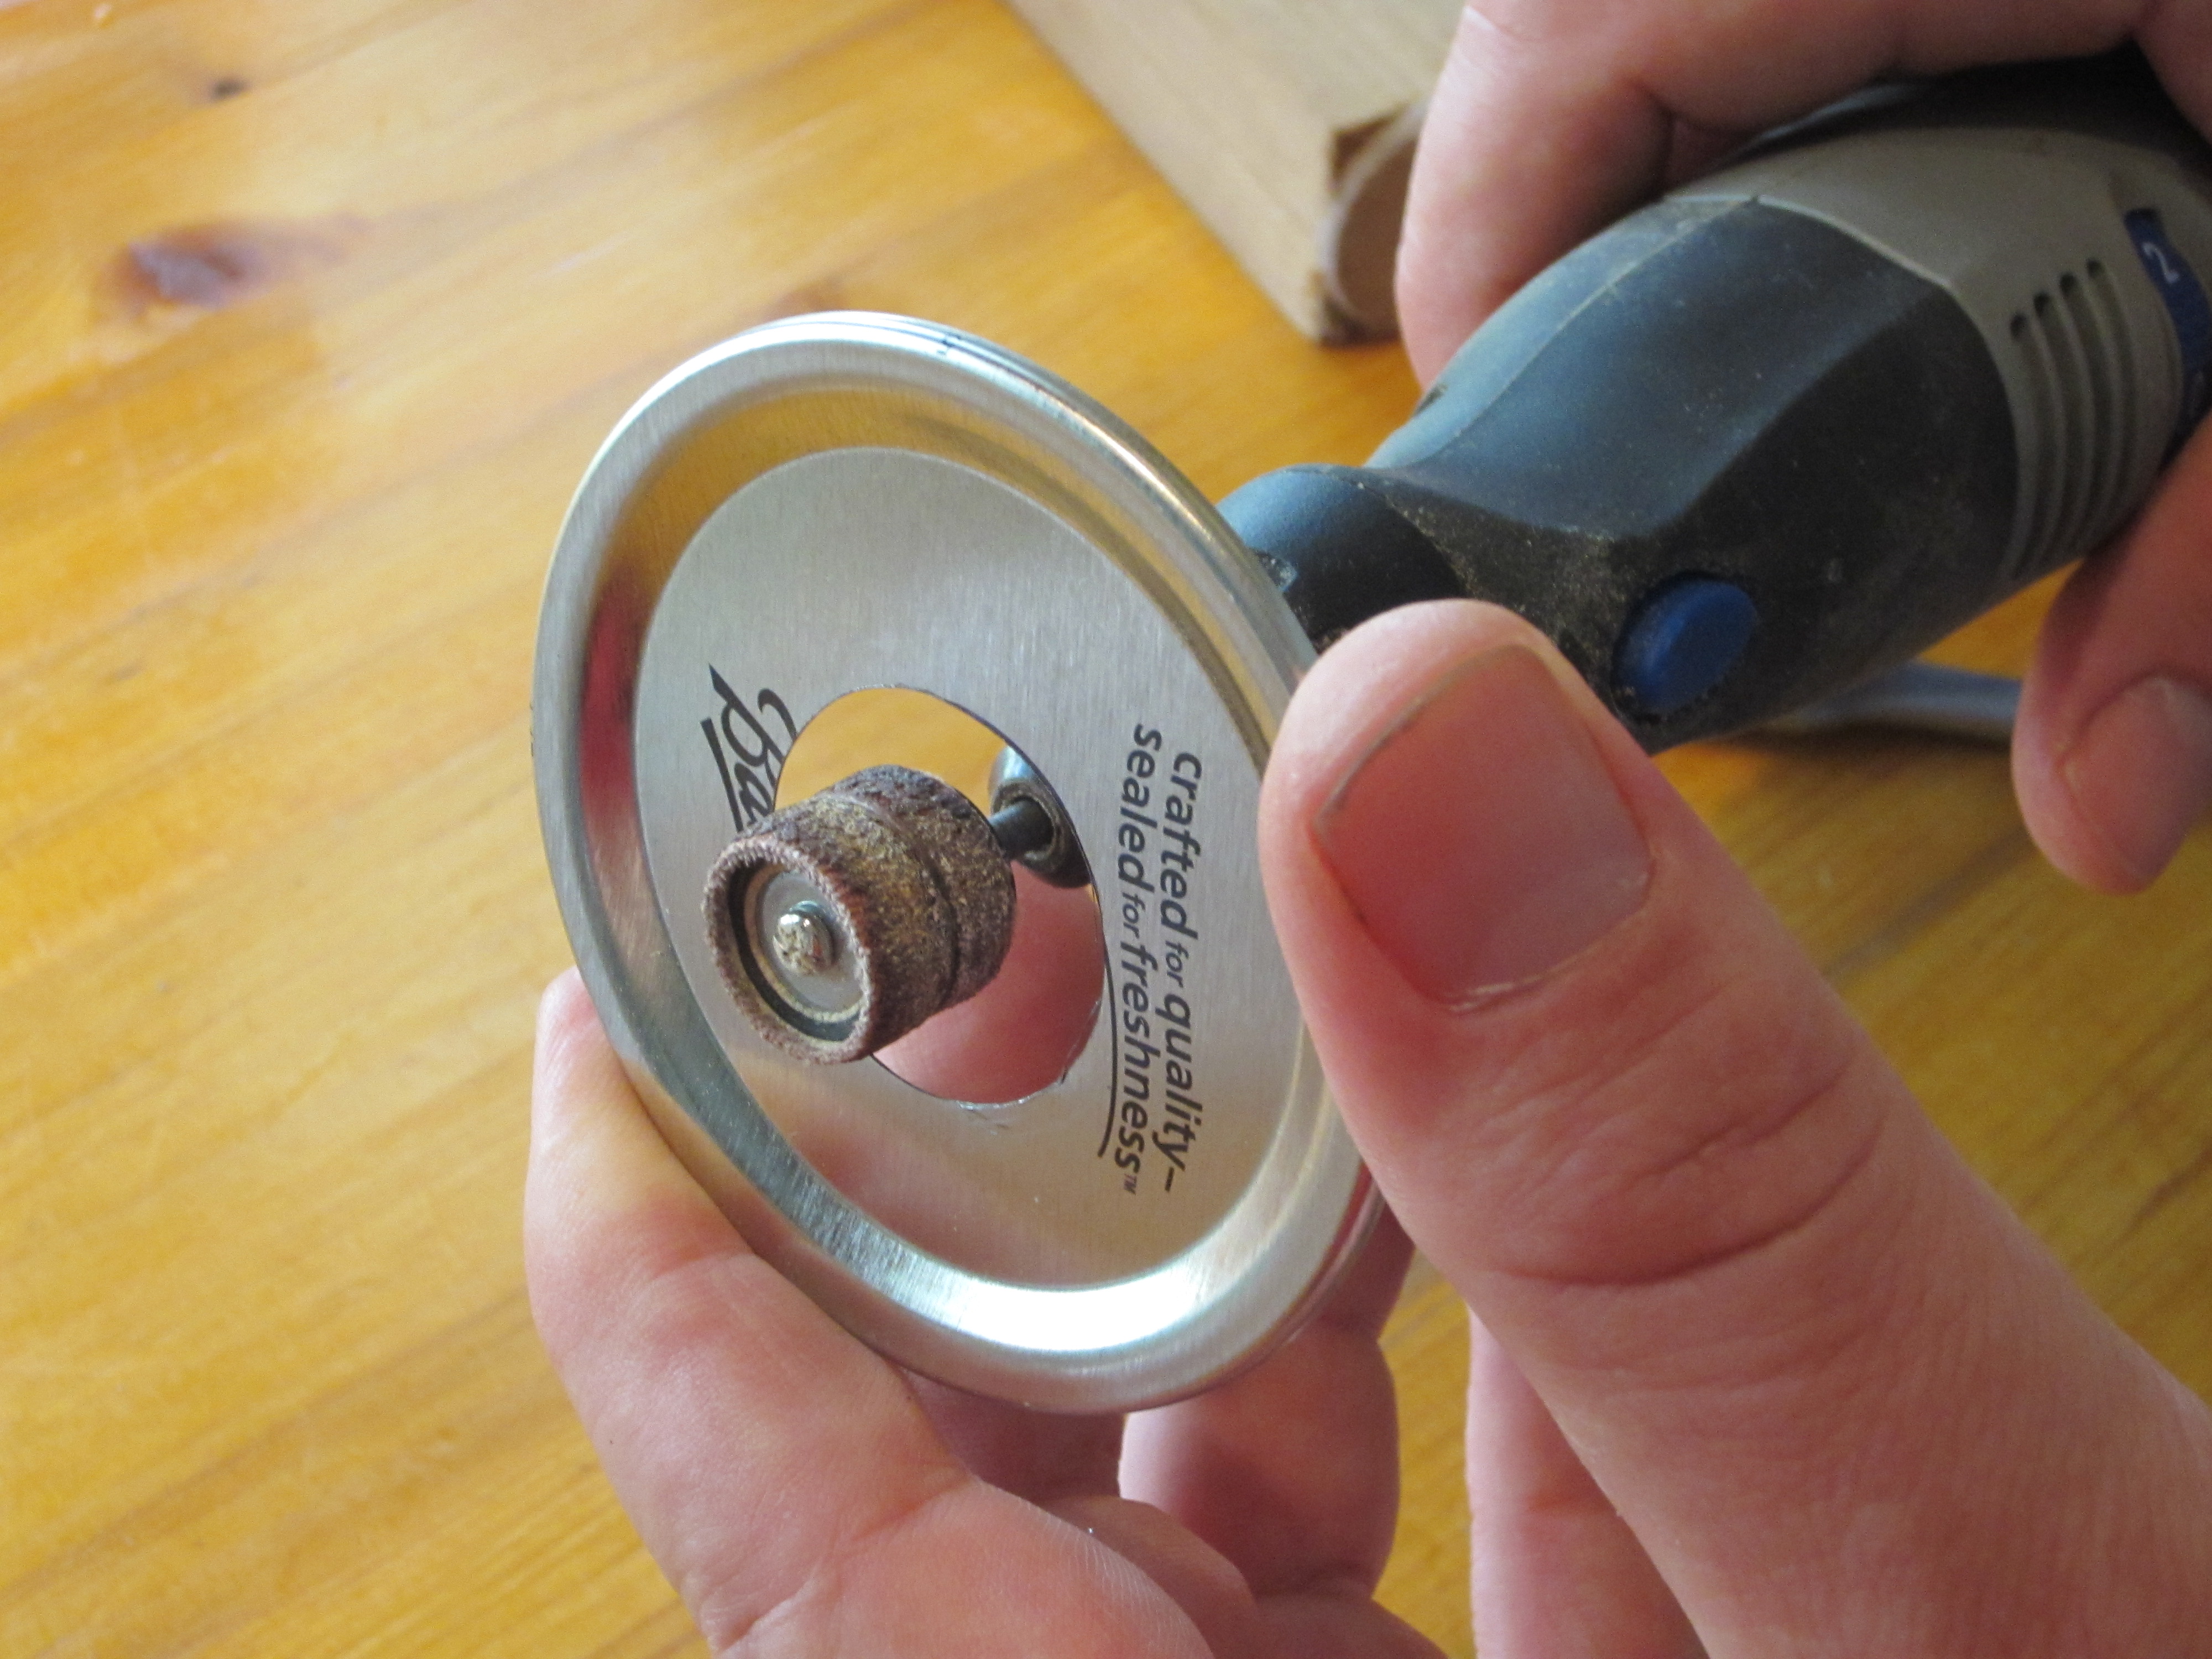
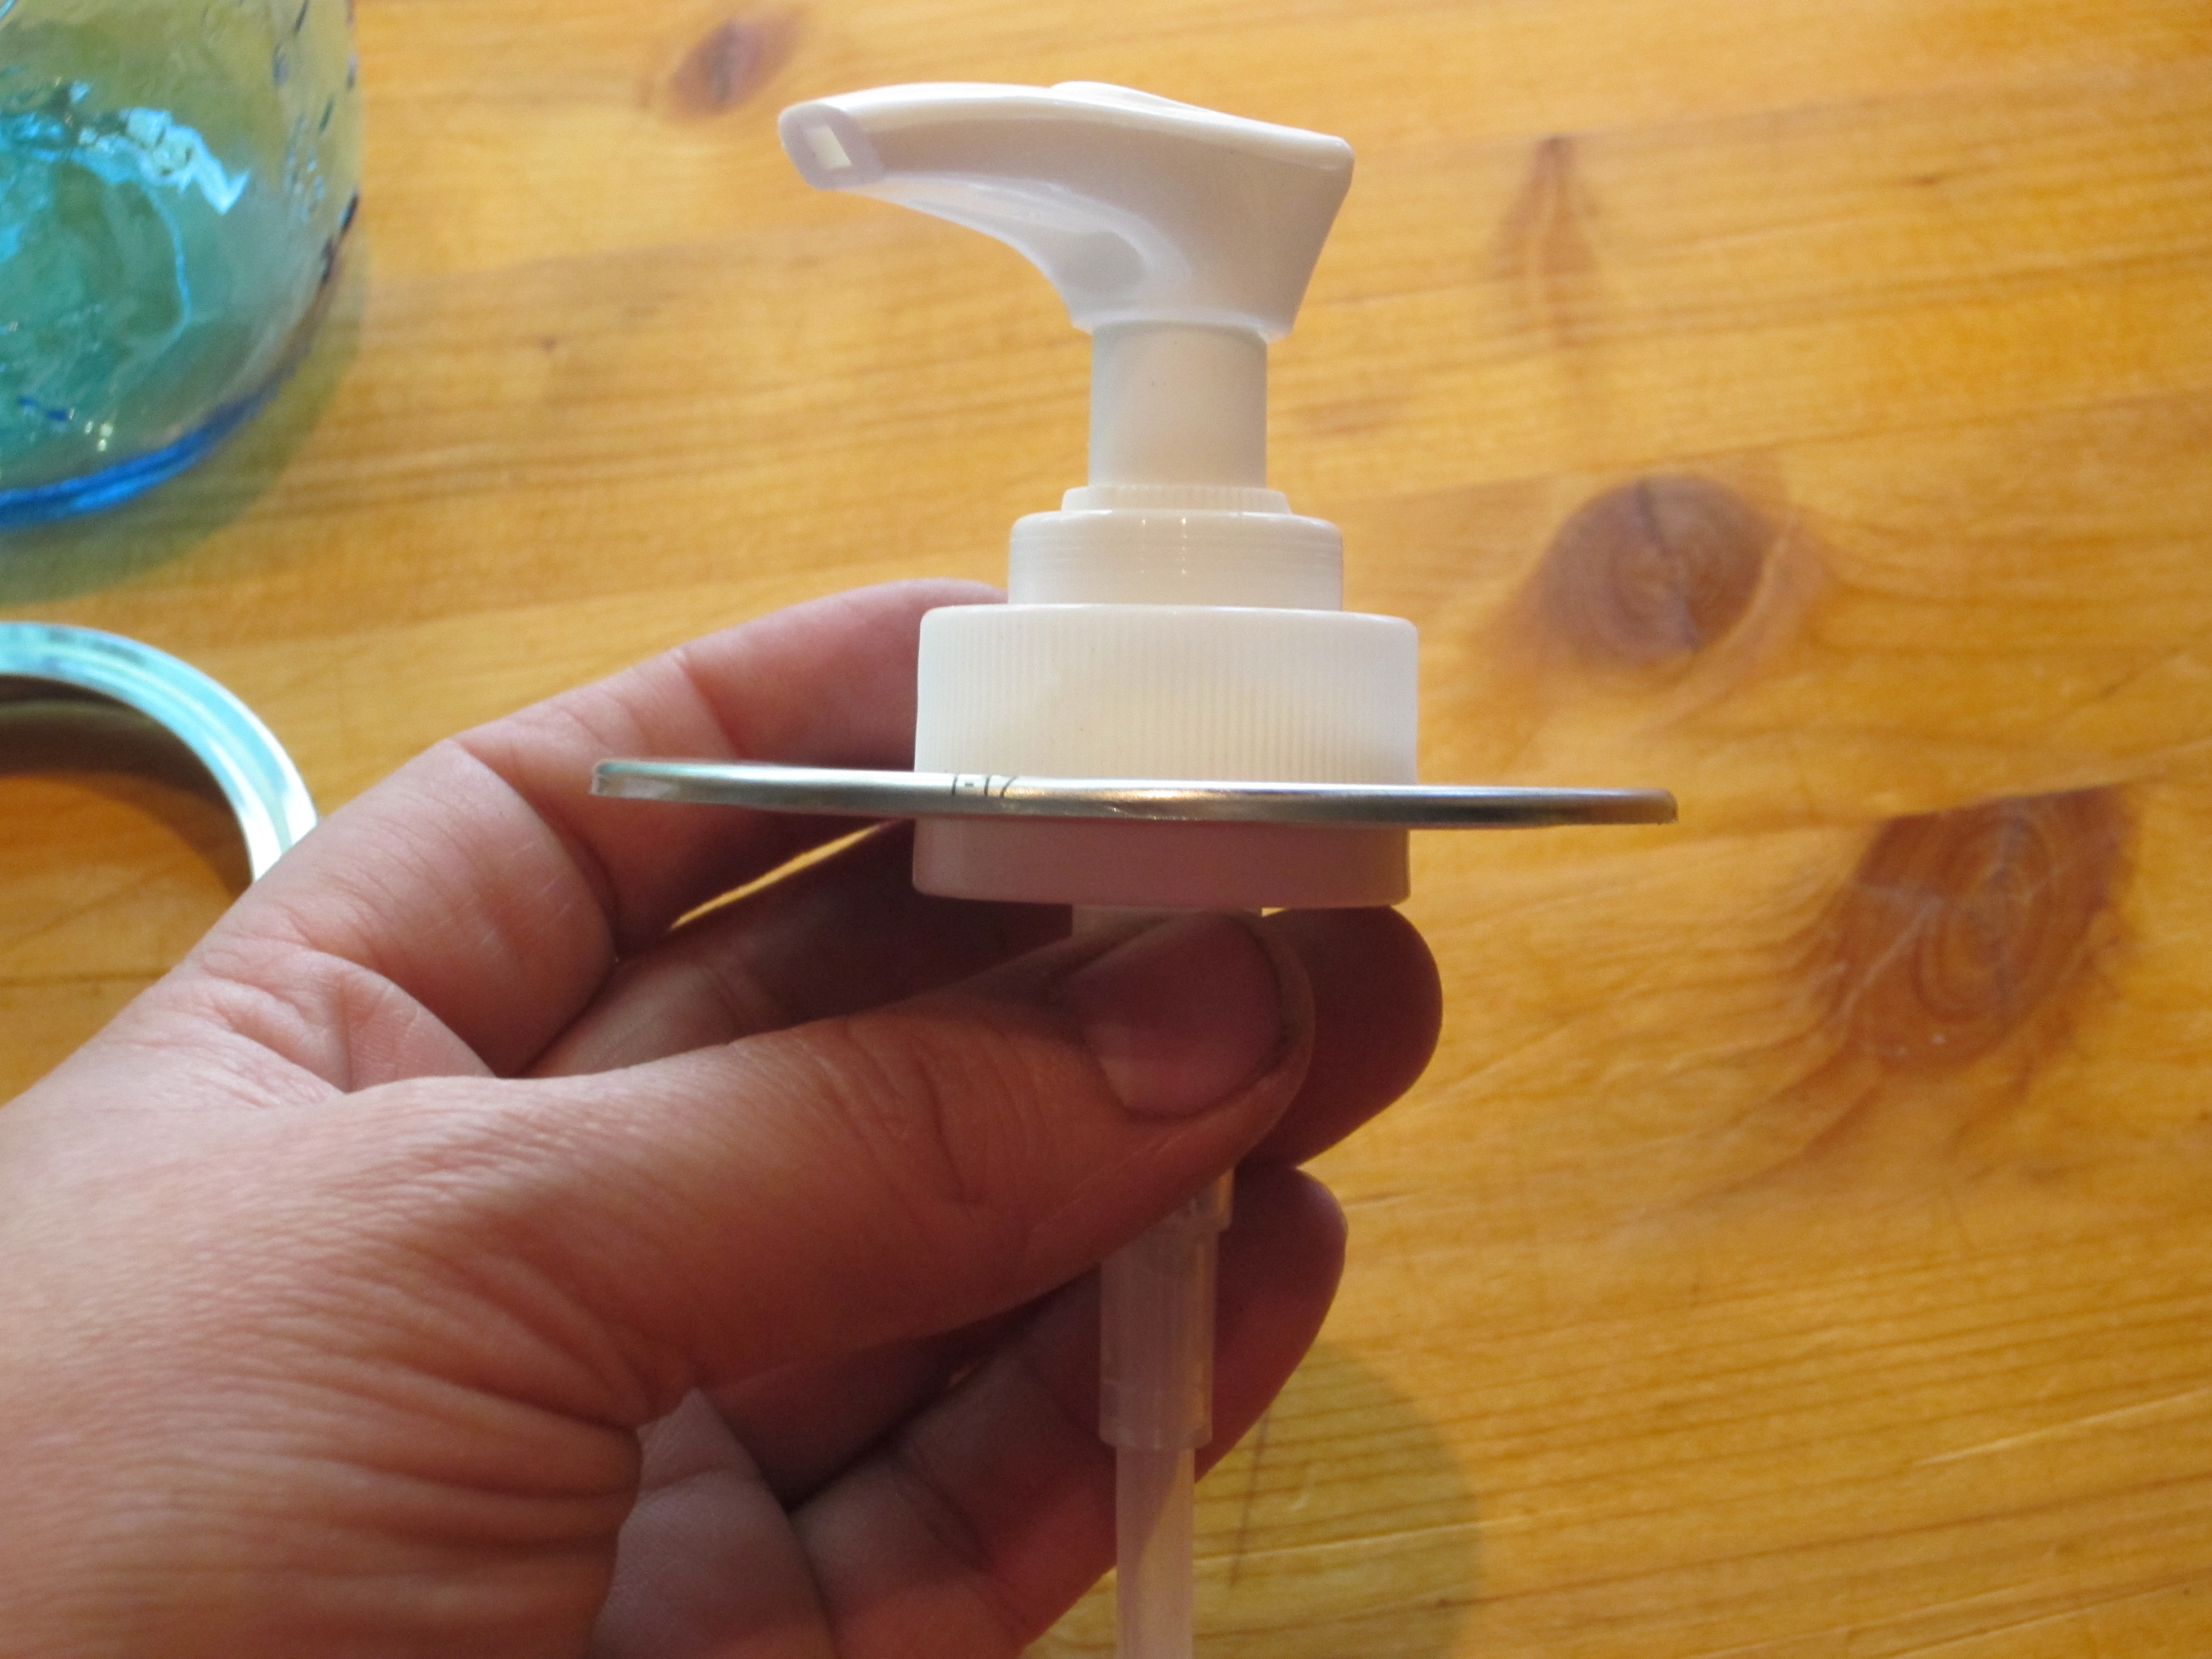
Once you are done, see if the collar of the soap pump fits through the hole.

IMG_2166

If it won’t quite fit, use the Dremel to file down the edges of the hole you cut just until the collar slips through.  Be careful not to make it too loose.

It will look like this when you’re done.

IMG_2167

Next, you will need to trim the tube to fit the size jar that you used, being sure to trim it at a slight angle.  (Sorry, I did not take a pic of this step.)

Fill your jar with your desired soap, place your dispenser onto the top of your jar, screw the band in place, and you have a beautiful soap dispenser!

IMG_2175

*This Post contains affiliate links!*


This post is linked to:

Heritage Homesteaders Blog Hop

Homestead Blog Hop


How to Repurpose A Lard Bucket, otherwise known as “My New Egg Bucket”

I had an empty lard bucket that I wanted to do something with, and then I had a brilliant idea!

All you need is:

Krylon Paint for plastics (I used black and red)

An empty bucket

A few stick-on letters

A little time!

IMG_2053

Start by removing the lid and handle from the bucket.

IMG_2057


Next, give it a good washing in hot soapy water.  You’ll probably need to wash it a few times.  Once it’s nice and clean, allow to completely dry.

IMG_2055IMG_2054

Take outside and spray paint desired color.  You will probably need to paint a darker bottom to hide all the colored inks in the bucket itself.  I used black as the bottom coat on mine.  I also painted my lid and handle black.   Once dry, I placed the letters where I wanted them & began painting my second color.  I painted both the inside & outside of my bucket red.

Once it was completely dry, I brought it inside & reattached the handle.

IMG_2135

I also made this little “cushion” to go in the bottom of the bucket to keep the eggs from making contact with bottom of the bucket – hopefully to keep down on any “accidental” cracking of the eggs.

IMG_2138IMG_2139

Voila!  My new egg bucket! I love it!

IMG_2141

I may just have to make a few more of these as I come across empty buckets!


This post is linked to:

Heritage Homesteaders

For a precious little one…

I can finally post pictures of my latest baby blanket.  Getting it washed, gift-wrapped, & ready to go to this precious little one was easy – delivery is another story.  Even though we don’t live that far away from each other, it’s not easy to get together.  Well, my oldest daughter recently changed jobs & is working at the same company as the daddy of this precious little one.  So, I sent it to work with her on Wednesday. I wish I could show you a picture of the little one that this was made for, but I can’t until the adoption is final.  He’s so precious!  And, I’m sure he’s grown quite a bit since I last saw him! 

Here is his blanket!  And just in time for the cold weather, too!

Arlin's blanket

Arlin’s blanket

When I asked mommy & daddy what colors they were using in the nursery, they said they were doing a Bible story theme, so no specific colors.  When I asked if they had any favorites, the reply back was, “bright colors!”  So, that’s just what I did! 

IMG_1733

I just love how the colors turned out!  It was a little tough to give it up since the color were so pretty, but I know know sweet little Arlin will enjoy this blanket for many years to come.  And, I always make my baby blankets about toddler size so that the blanket can be used for a long time, and not just for a few short months. 

Welcome to the family, Arlin!